More Fun With Nightwatch: The Corrupted Garrison

Having really enjoyed my first adventure using the Nightwatch rules, the only thing for it was to keep experimenting. How easy would it be to adapt Nightwatch to exploring a dungeon environment? Only one way to find out: send more hobbits into peril!

The main challenge would be adjusting the movement rules given the relatively cramped interior spaces involved. Per the book, the default movement rate in Nightwatch is seven inches (a six inch front-to-back or "leap frog" move) that is halved for difficult terrain. In my estimation, this would be way too generous for indoor adventuring. The solution was pretty obvious, based on my experience with "crawler" board games and our own "Dungeons Deep & Caverns Old" miniatures game: zone movement. So once I had the basic layout of the dungeon set up, I just needed to carve it up into zones.

I'll reference this map throughout the report below but for now suffice it to say that our adventurous Halflings would spend their first free move to enter via E1 into zone 1-A. Green rectangles represent open passages while red ones designate passages that are permanently or temporarily blocked.

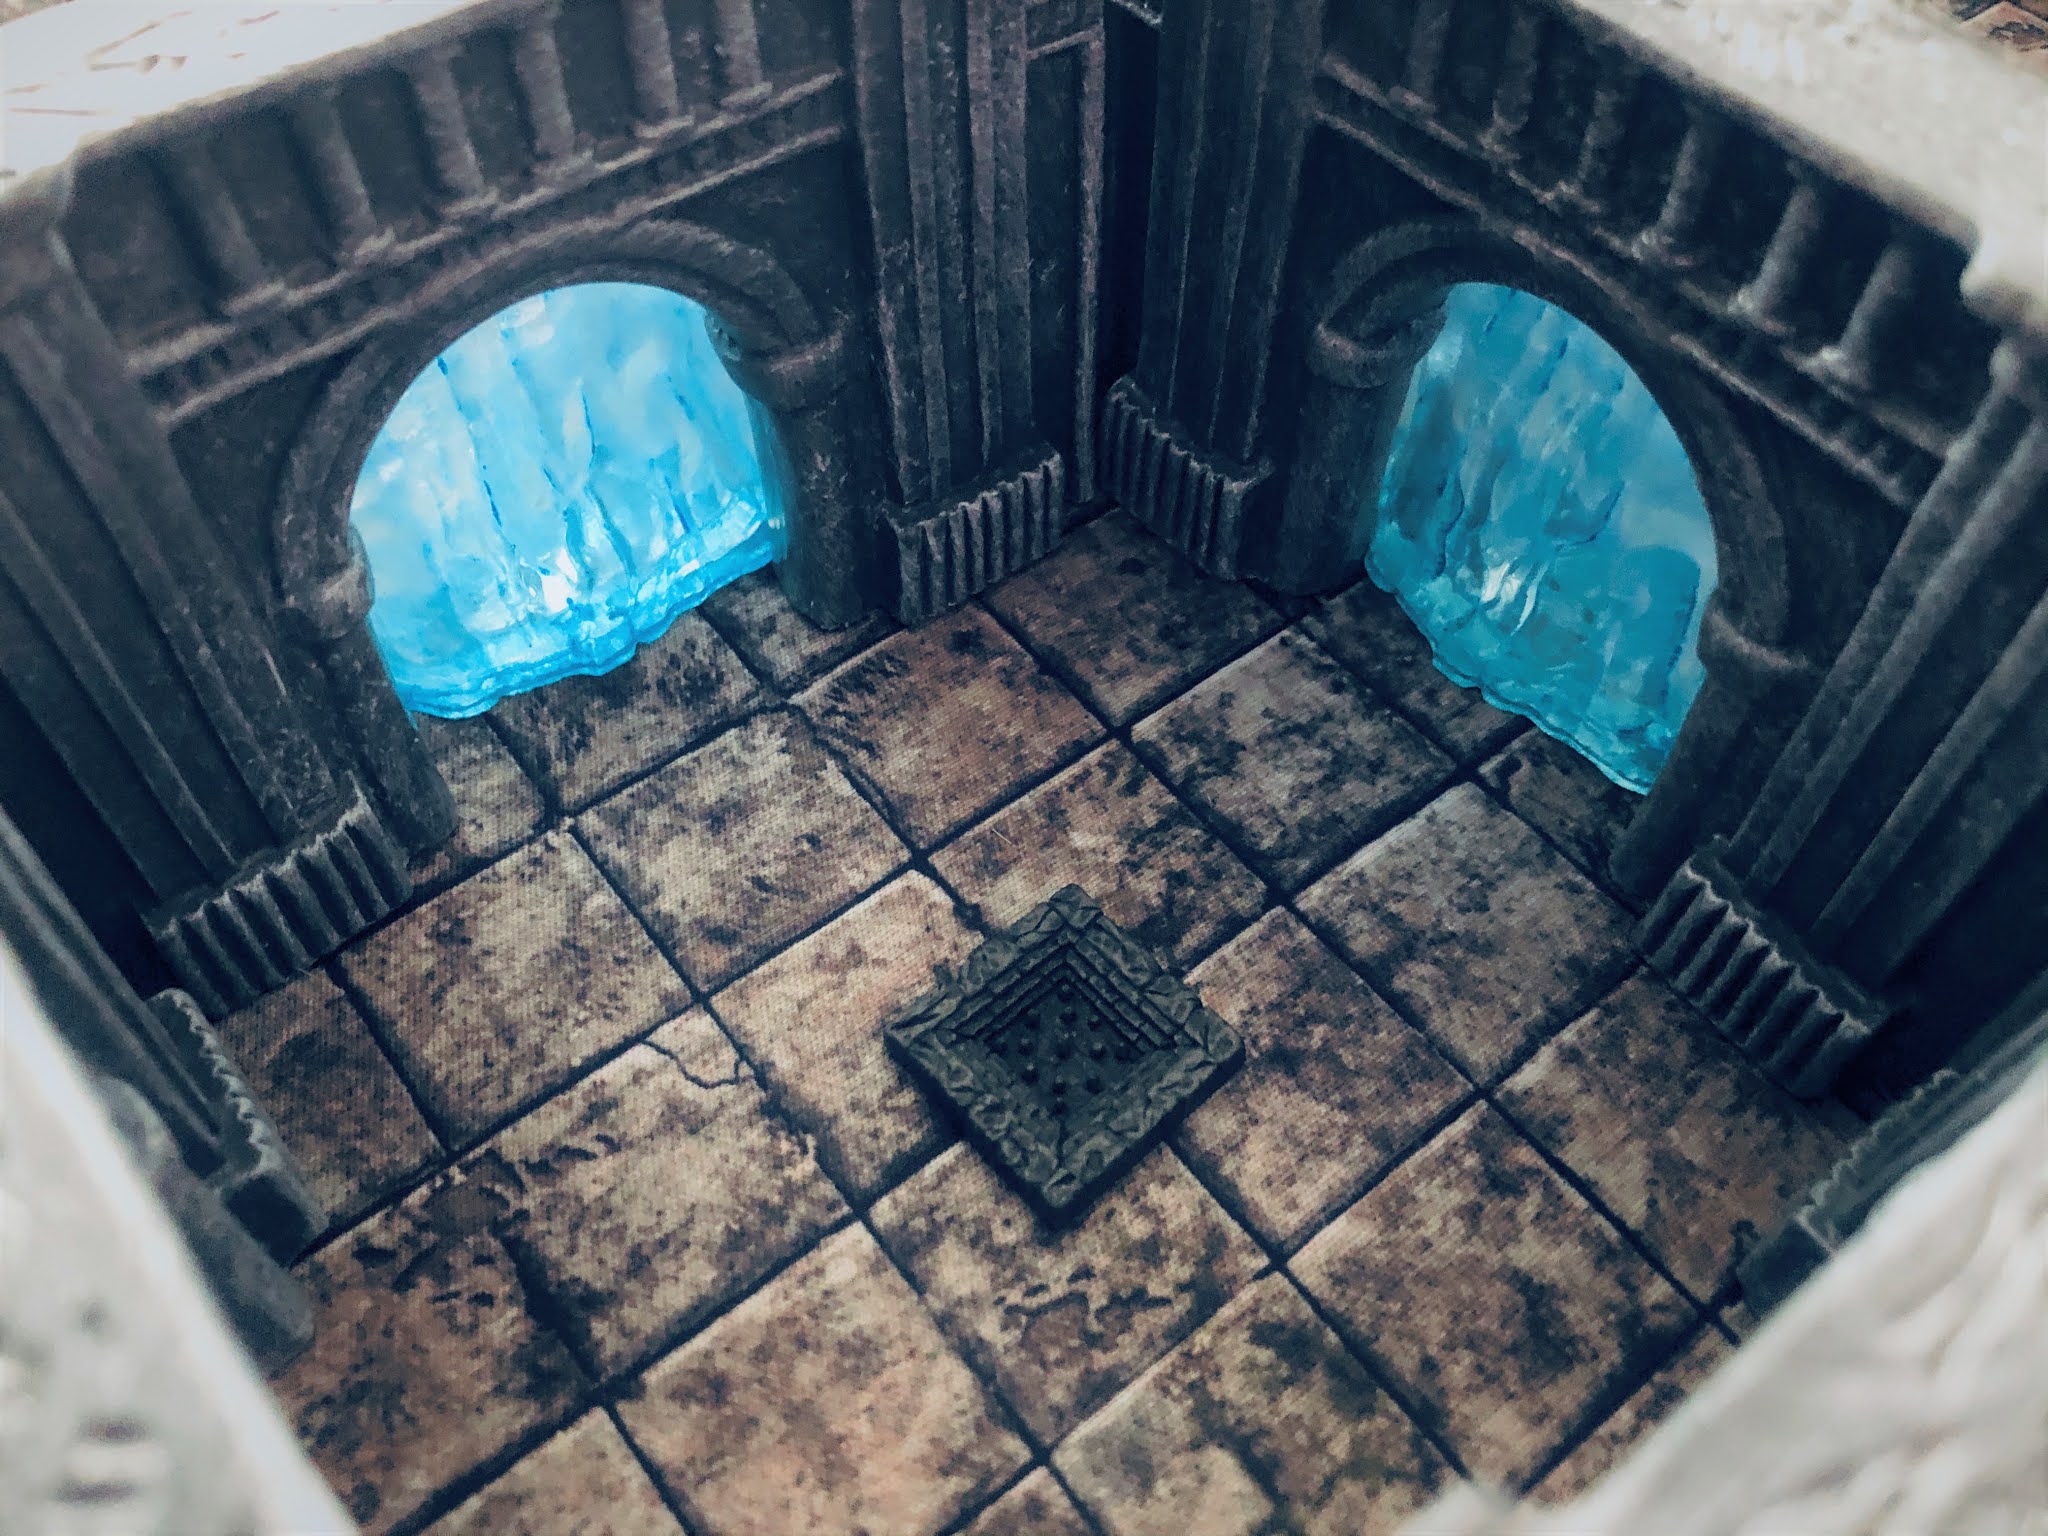
The next challenge was handling indoor ranged attacks. I constructed this dungeon using pre-painted terrain available from Urbanmatz; more precisely, their Gothic Walls. This set has pieces with open passages as well as semi-obstructed ones per the photo below.

I decided that neither PCs nor Monsters could move through these passages but could shoot through them at a -2 penalty. Several Skeletons armed with bows started in-play, in rooms where they could be shot or from which they could shoot out but not be reached for melee combat.

The next issue was figuring out how tough to make the Skeletons. I started out by using the Vermin rules (free move + 1d6 activation dice pool) but found that made the bonemen too chumpy. So I settled on giving them a 2d8 dicepool and allowed them to spend 1d8 for a free move. The result was them being pretty dangerous but also kind of slow, which felt right for the dungeoneering experience.

Room 2

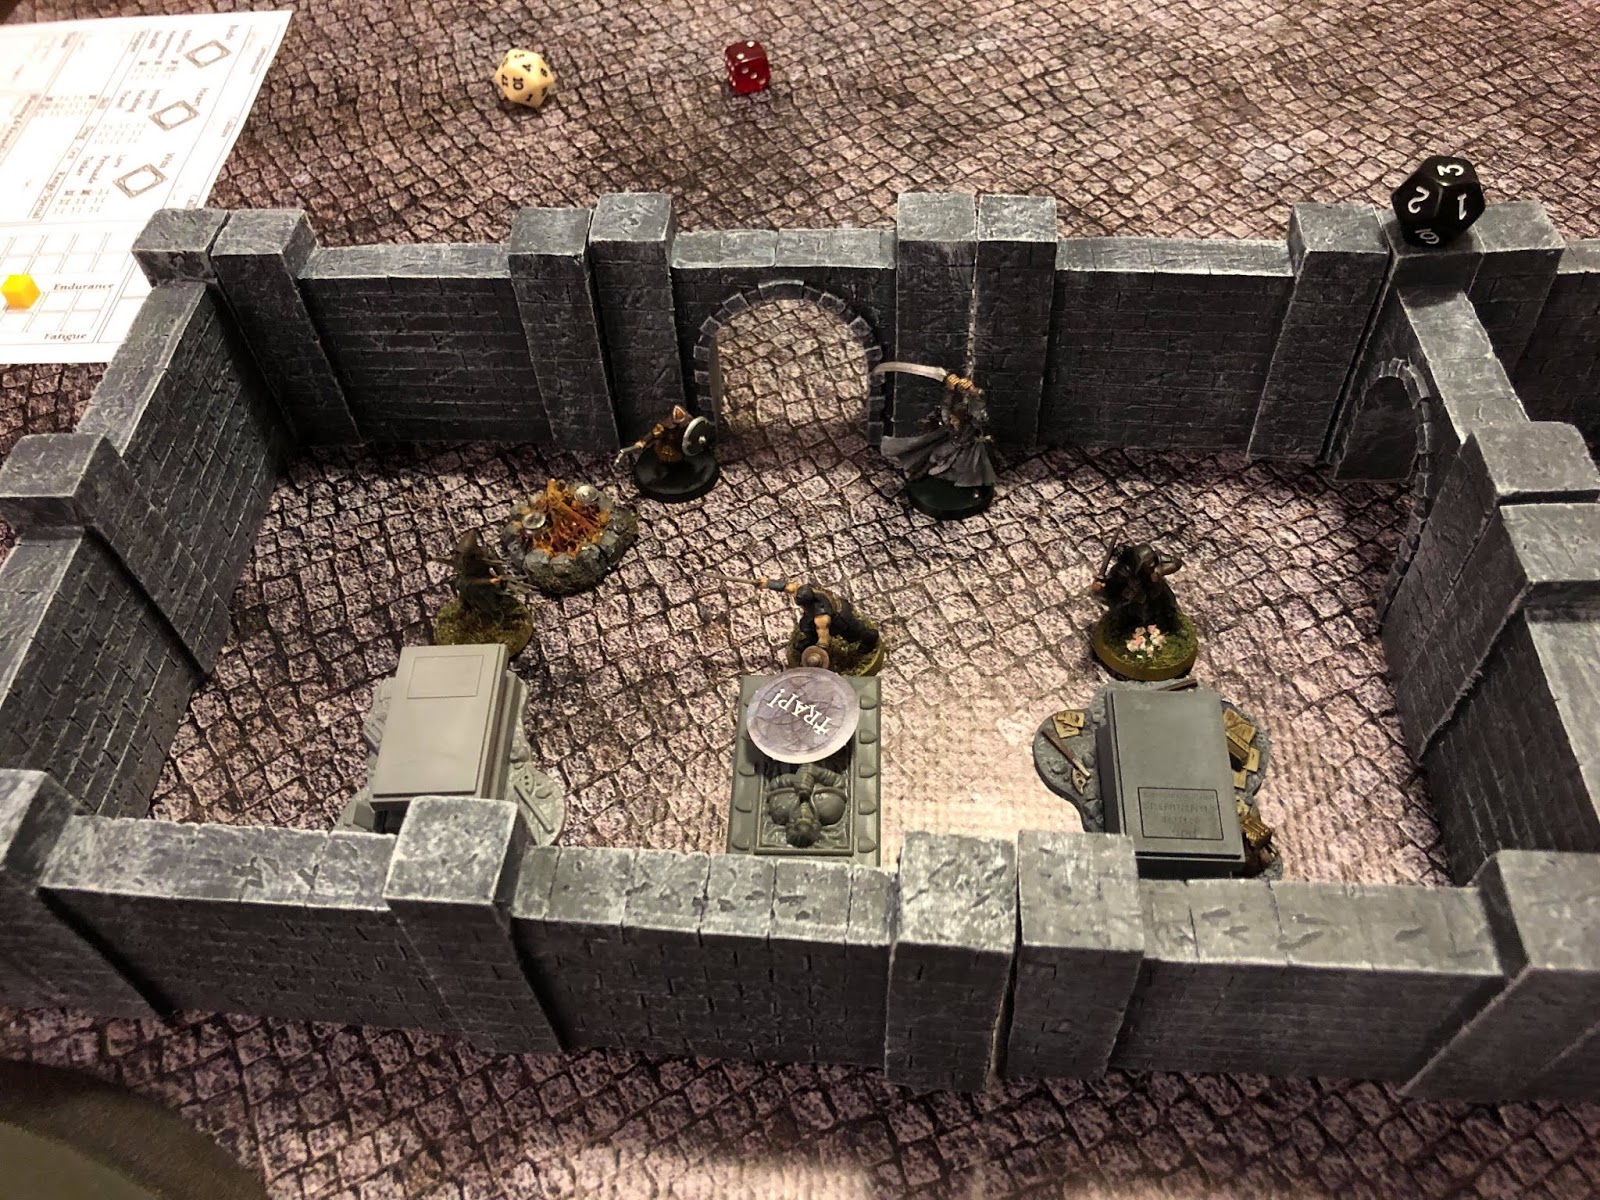
The Halflings started by exploring Room 2, the barracks. To get to the investigation point in zone 2-C, they would have to navigate either or both of zones 2-A and/or 2-B. As you can see on the map above, I have those zones marked with a special border, indicating that they are dangerous terrain. In the picture above, you can see that there are traps on the floor.

Mechanically, this is represented by the PCs needing to use an action to make a check to avoid the traps when moving into (but not out of) the zones. The PCs need not make this check, but if they don't (or if they did and failed), they would take a wound. This further slowed down the pace of exploration and lent the small space a somewhat "larger" (cinematically speaking) sense.

Having made it past the traps, the Halflings found a tattered journal in a chest next to the bunks indicating that the nearby Chapel-Infirmary (Room 5) had been desecrated and the corpses of former guards turned into necromantic batteries powering magical barriers preventing exploration deeper into the dungeon.

Room 3

Two of the three magical barriers were blocking the north and east passages of the central intersection at Room 3, which as you can see from the map and the photo above was also trapped. The Halflings had little reason to back to Room 2 but nevertheless the trap in Room 3 would make navigating the dungeon difficult throughout the entire session.

In a small pouch tucked away with the journal, the Halflings found a charm that, according to the anonymous author, could be used to purify one of the defiled corpses and thereby dissolve the associated barrier. But navigating the Chapel-Infirmary, would be precarious because it was likewise full of traps. This time, poison gas! Fortunately, the journal also explained that an antidote for the poison could be found hidden away somewhere in the cluttered stores (Room 4).

Room 4

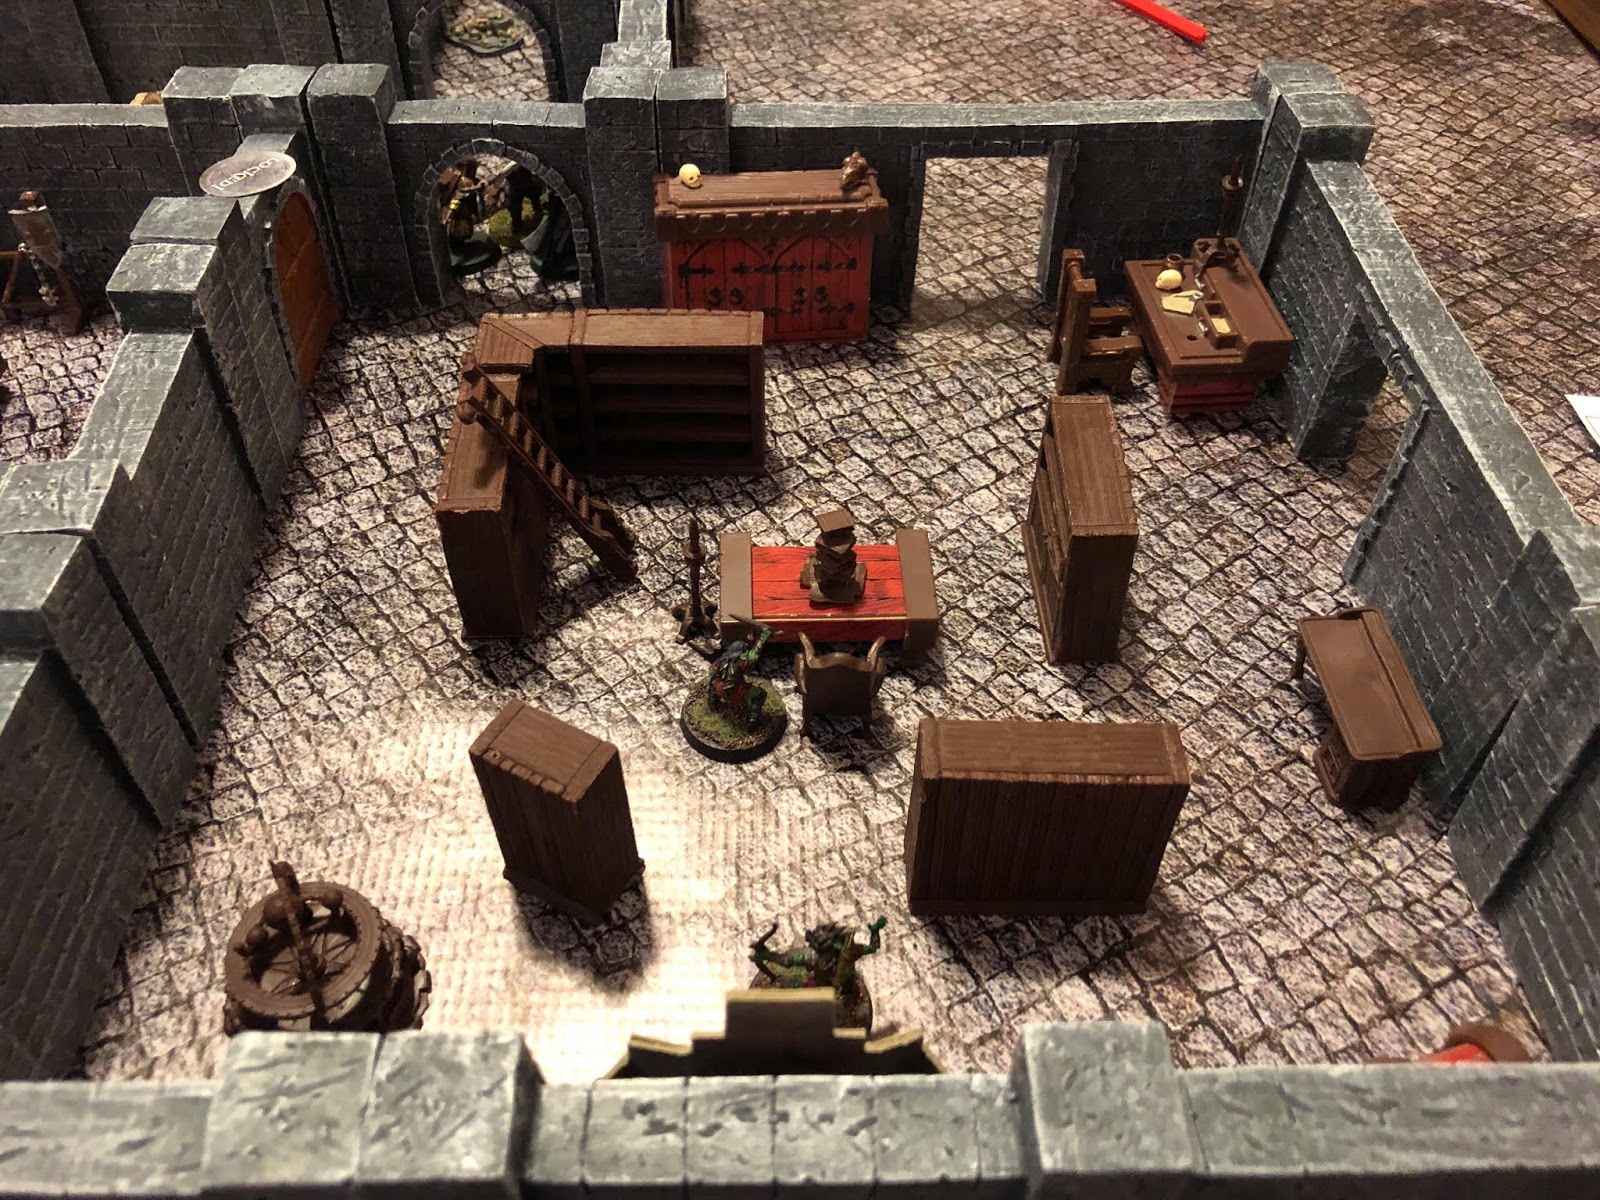
Even despite Room 4 being one of the smaller physical spaces in the dungeon, I decided to carve it into three zones to simulate the difficulty of navigating all the junk. (Note that D3 is permanently blocked by cumbersome supplies.) I had a mechanic kinda-sorta in mind for how the Halflings could try to find the poison antidote among the crates and barrels and chests but I did not end up using it because, well, let's just continue the story for now. On to the Chapel-Infirmary.

Room 5

Room 5, like Room 4, is carved up into quite a lot of zones. I designed this area for a lot of player interaction and wanted to make sure that it was plenty dangerous but not overly lethal. Instead of taking a wound for failing the check to move carefully (or just failing to even attempt to move carefully), the unlucky (or incautious) PC would take a poison token that would inflict a -1 penalty on any roll of their largest remaining die in their dice pool.

So, for example, a PC who had already taken a single wound also took a poison token, they would roll their d8 at -1. If they took an additional poison token, they would roll both their d8 and d6 at -1. Worst of all, a third poison token at this point would eliminate their free move! This ended up being pretty tense and, well, let's just say I probably should have spent some time searching for the antidote.

I should also note that all this time, during the Darkness phase, a single Skeleton had a 5 in 6 chance of entering the dungeon at E2. So in addition to all of these traps, the Halflings were also constantly fighting the undead (who I decided could not be harmed by the traps). But at this point, things were still looking pretty good.

In order to lower one of the magic barriers, the Halfling equipped with the charm would need to perform an interact action at one of the three investigation points in zones 5-B, 5-C, or 5-D. I decided that it didn't matter which one at this point: upon a successful interact action, the barrier blocking D1 would dissolve. The issue was, which barrier would be dissolved the second time the Halflings tried the ritual? I decided to randomize it between D2 and E4.

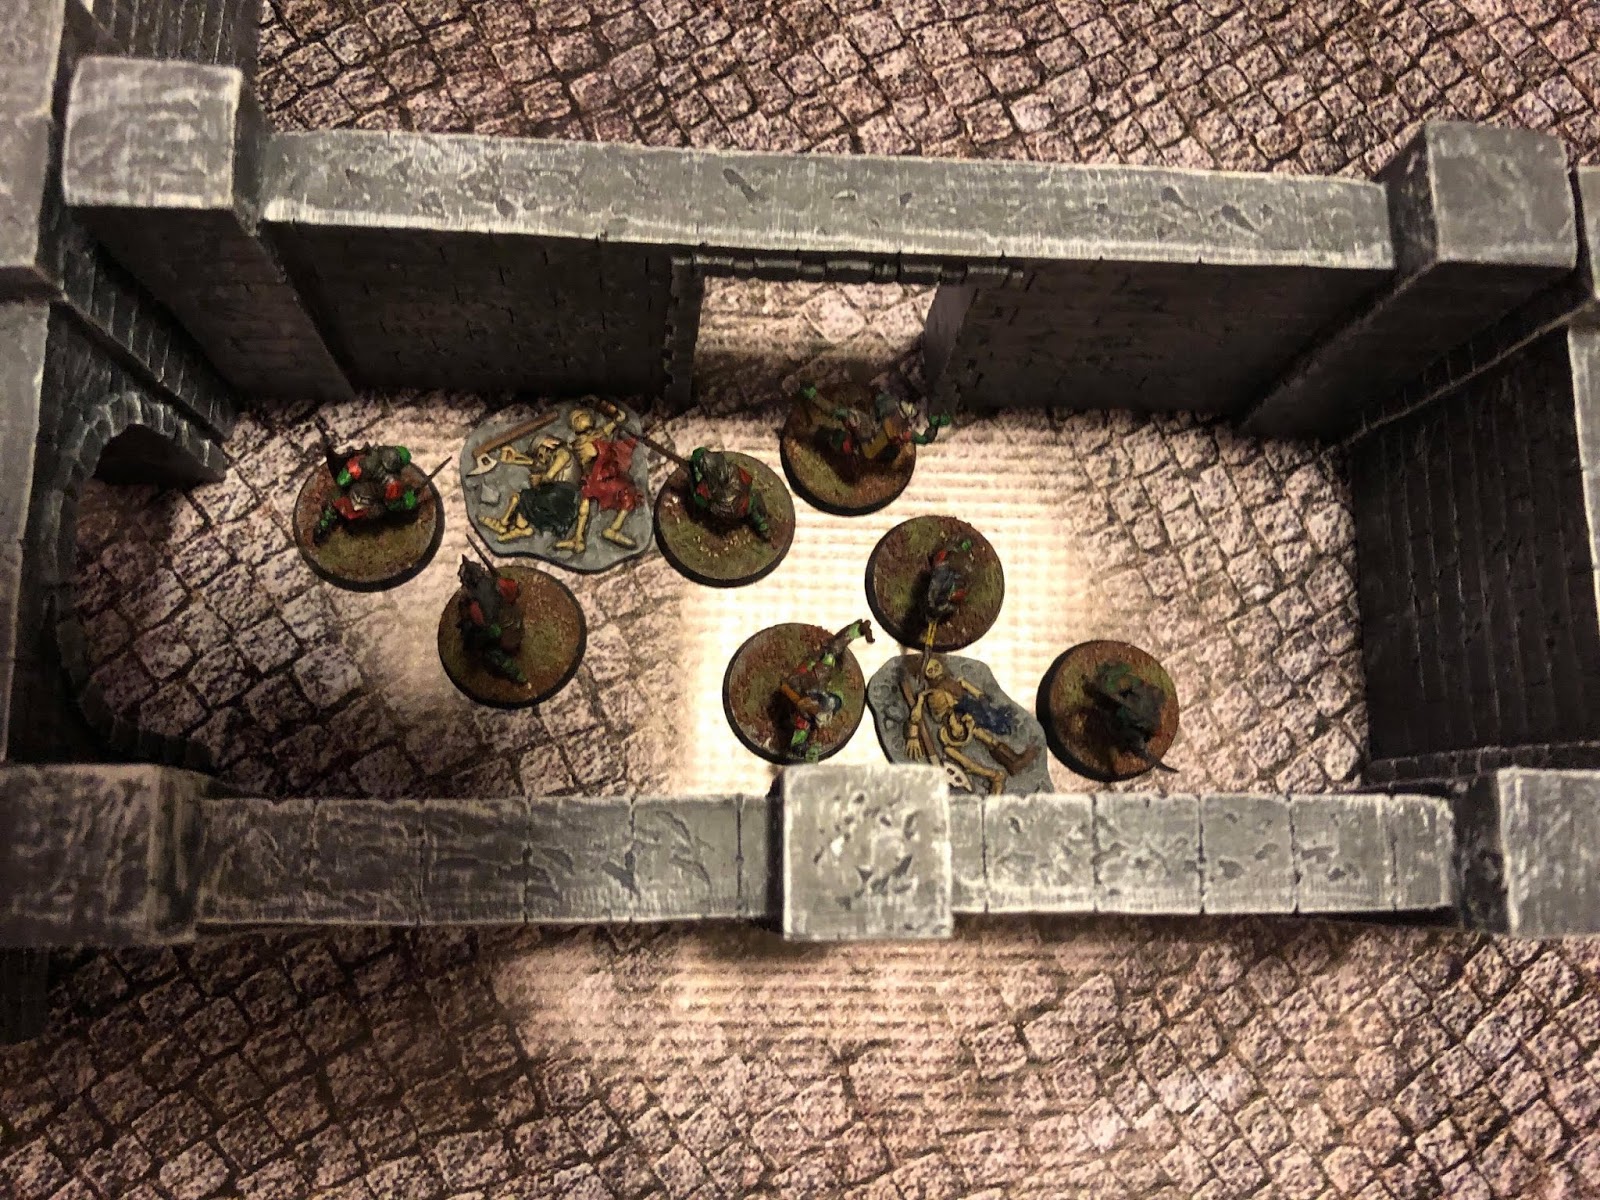
Also, at this point, Skeletons were now appearing at either E2 or E3. Rooms 8 and 9 were of course still blocked off by D2. The idea there was, if the PCs dissolved the barrier blocking D2, a whole slew of bonemen could march out at them together ... or not, depending on how the dice rolled when it came to randomly assigning new Skeletons every Darkness phase. As it turned out, quite a few of them started to build up at 8-A:

Room 8

But that wasn't a problem just yet. Dissolving the barrier blocking D1 opened up Rooms 6 and 7. The first was just a hallway with another magical barrier blocking E4. But Room 7 was the Officer's Quarters, where the Halflings could find another charm to purge one of the remaining two necromantic barriers in the Chapel-Infirmary. No matter which investigation point they chose, however, the outcome was a fifty-fifty chance between D2 and E4.

Room 7
As it turned out, the Halflings dissolved the barrier blocking E4 and behind it stood the Terror! I somewhat foolishly did not adjust the Terror's rules so it had a free move plus its usual 3d10 dice pool. At this point, I decided if the Halflings could defeat the Terror they would "win." They were in fairly good condition, with just a poison token each. So they bravely, or foolhardily, rushed to meet it; and it did likewise.

The Final Confrontation
Unlike normal Terrors per the rules, I also decided that this one, the Terror of this particular dungeon, would have three rather than one wound. The Halflings fought bravely but, worn down by constant combat with the roving bonemen and the poison gas, they could not land the final blow before meeting their own fates.

Alas!
It's worth noting that had the barrier blocking D2 been dissolved it would not only have unleashed the Skeletons waiting at zone 8-A but also opened up the final room, the Commissary.

Room 9
The Commissary is pretty spacious but I left it as one zone. The idea was that in order to move into base to base for melee combat, Skeletons and PCs starting their turn inside of Room 9 would still have to make a move action. But they could enter the room directly in melee range with an enemy already in that room. The other idea was that the PCs could make a search action in the Commissary at any time to obtain a Health Potion. This ended up being sorely needed in the final analysis, but of course Room 9 was never accessible.


I didn't spend a lot of time spinning a tight story about why the Halflings were exploring this dungeon, what had happened there, or exactly how the whole thing should work. The point was to quickly get something put together to just keep playing around with the Nightwatch rules. In conclusion, Nightwatch again proves that it is flexible enough to be used for fantasy adventuring beyond the theme laid out in the book without much pre-planning. This whole dungeon fit snugly onto a 2x2 mat but one could easily imagine a much more extensive structure with all kinds of more complicated and dangerous encounters.


Fantasy Adventure with Todoroff's Nightwatch

Ostensibly, Nightwatch is a game about seasoned monster hunters sworn to chase down and ultimately rid the world of some terrible evil. And between these grim hunters and their quarry are wave upon wave of relentless minions. Cool, but not necessarily what I'm looking for in a miniatures game. Rather, I want a miniatures game that emulates the feel of classic D&D adventuring without a dedicated DM player. Nightwatch seemed promising, in that it's a solo/co-op game where the players control a small group of adventurers defined by their classes.

But I had one major concern: designer Patrick Todoroff writes, "you'll need need several dozen monster types of various kinds." First off, I just don't want to have to buy, assemble, and paint up that many miniatures for what, for my purposes, should be an "ultra skirmish" game (i.e., very low figure count). But more importantly, squaring off against dozens of monsters just doesn't feel like D&D to me. YMMV. So could I get the results I wanted from Nightwatch without the "several dozen" enemy miniatures? I set out to find out armed with a paltry nine plastic Skeleton figures from Wargames Atlantic. Against them stood four brave plastic Halfling figures, made by the same company.

The other concern was more broad: Is Nightwatch flexible enough to handle my particular vision of D&D? This boils down to an approach where "calls" matter more than rules. That is, where the game supplies tools to support adjudicating whatever crazy things might come up during the course of play rather than forcing play into predetermined categories of interactions. Would my brave Halflings be able to do anything beyond move, ranged attack, melee attack, rinse, repeat? What if they wanted to try to swim in a river, for example? Again, Nightwatch seemed promising because Todoroff clarifies straightaway that "Nightwatch is a toolbox, not an extensive, pre-packaged, comprehensive system."

OK so challenge accepted! Where to begin? If it was a "theatre of the mind RPG," I'd need a story hook. But for a miniatures game, at least in my approach, story begins with terrain. And this seemed like a wonderful excuse to dig deep into my collection of ready-to-play terrain items from Gale Force 9, Wizkids, and Monster Fight Club. So, prior to game night, I fiddled around with a couple of 2x2-foot neoprene mats from Battle Systems and a wealth of scenery.

A Perilous Quest

A story began to emerge as I tinkered away. Wishing to seize control of a strategic bridge, a necromancer attacked the surrounding community and devised a typically macabre means of garrisoning the ruins: by way of corrupting energies, symbolized by fell crystals growing out of toxic pools, sorcerous standing stones erected nearby in the forest would continuously reanimate undead warriors to hold the bridge. Consulting an erudite scholar of magic, our heroes learn that shards of these crystals must be sheared off and used at the standing stones in a ritual to exorcise their horrid power, thus liberating the bridge.

In game terms, the objectives were to (a) get to the green stars (the crystals) and use an Interact action to collect a shard from each and then (b) carry the shards to the blue stars (the standing stones) and perform the ritual with another successful Interact action. Skeletons would be defending the ruins of the town and any that were slain in the process of exploring the ruins would be redeployed at one of the two standing stones, returning to further harry our heroes. The Halflings started at the red circle at the river ford.

Here is what the Halflings ended up facing on game night, on the ruined town side of the play area:

Oh man look at those bonemen go!

Note that there are "investigate tokens" placed on various elements of scatter terrain, indicating that these are searchable. In base contact with the crates and barrels, a player character ("PC" - I'm using the standard RPG term rather than Todoroff's theme-specific term "Hunter") could make an Interact action to search them for useful common items: roll 1d10 and on a 1-9 it would be one of the common single-use scrolls, potions, or "grenadoes" a character can start the session with and on a 10 it would be a single-use Token, a kind of magical curio. Common items take up a "belt slot" of which a PC only has two, whereas Tokens do not take up a belt slot.

Also of importance: to get to a crystal for the purpose of breaking off a shard, the PCs would have to wade through toxic sludge. In addition to being difficult terrain (halving movement), any character who ended their turn in the sludge gained a Poison Counter. Three of these translated into a Wound, of which PCs only have four. And for each wound taken, a PC loses one of three potential activations during his turn.

Meanwhile, here is the comparatively desolate forest portion of the play area, where the necromancers vile servants erected the magical standing stones:

Spooky Times Ahead

We randomly determined that the river flowed slowly from the town side toward the forest side. Apart from the ford, it counted as difficult terrain plus any figure that failed a movement check when attempting to cross it would be carried two inches down river. None of this is from Todoroff's rulebook; it's just the sort of "D&Desque" call that I like to flavor a scenario. It would become pretty important later on ...

Reolus the Ranger Found 1SP.

Getting into the action of our session requires a little bit of description of Nightwatch's mechanics. All PCs have a dice pool consisting of 1d6, 1d8, and 1d10. Any action, apart from a free move, requires selecting one of these dice and rolling a 4+, which is obviously easier on a d10 than a d6. So if you want to move in addition to your free move, you need to roll one a 4+ on one of the PC's dice. If you don't, that PC doesn't move. If you want to hit an enemy in melee combat, you need to roll a 4+ on one of the PC's dice. If you don't, that PC's attack fails to hit. And so forth. If it's something you really need to work, use a die with more faces.

Once you roll a die, it is spent for this turn regardless of whether you roll 4+ on it or not. And when a PC has no more dice to roll, their turn is over. So each unwounded PC ends up with a free move and potentially three more actions per turn. Of course, if you roll really poorly you might only get the free move, but in my view something is better than nothing. The entire dice pool is ready to use again on the next player phase, called the Pact Phase.

Noble Scudamor Surrounded!

But before the PCs go again, the monsters get to act in the Darkness Phase. The most basic monsters are called Vermin and they have a free move just like the player characters but they only have a single d6 for their dice pool. I decided the Skeletons would be represented by the next most powerful category of monsters: Horde figures with a free move and a 2d8 dice pool. Just like PCs, monsters need to roll 4+ on dice to attack successfully or do anything else. If they successfully hit a PC, or if a PC successfully hits them, they get to make a Dodge/Defense (DD) save: roll a 4+ and you don't take a wound.

Almost all monsters in Nightwatch are vanquished upon taking a single wound. They roll their DD check on their usual die type (d6 for Vermin, d8 for Horde, etc.). PC's check DD on a d6 but the result can be modified by the type of armor they are wearing. Heavier armor can give you a +1 to your DD check but also cost you 1" of movement, and vice versa for lighter armor. When the attacker outnumbers the target, as in the picture above, the target tests DD at -1 for each opponent beyond the first. So PCs definitely do NOT want to get swarmed!

As mentioned above, PCs only have four wounds. But the bigger problem is a PC loses a die from his pool for every wound he has taken, starting with the d10, then the d8, and finally the d6, until a PC who has taken three wounds only has his free move left. Mercifully, you can spend your free move to Imbibe a potion in your possession ... like a, um, Health Potion.

What's in the boxxxx?

Having retrieved two of three crystals shards necessary to perform the ritual, our Halfling Heroes were making good progress into the ruined town. They suffered a few wounds which they shrugged off by way of imbibing Healing Potions they had wisely brought along, freeing up belt slots. So should they hurry on to the final toxic pool or search the ruins for other helpful items to fill those empty slots? After defeating this Skeleton spearman, plucky Priamus tried his luck and found a Smoke Grenade.

They went thattaway!

On the other side of the King's Road, reanimated Skeleton warriors so lately despatched by our intrepid Halflings returned from the dreaded forest to exterminate the intruders. The Skeletons had little enough trouble, with their free moves and 2d8 action dice pool, finding their way back to the action. So far, I did not feel like I really needed dozens of monster figures to have a dangerous adventure with the Nightwatch rules. These nine Skeletons were giving the Halflings enough trouble. Correction, eight skeletons. The Ninth had yet to reveal himself in his dark glory ...

Bumbling Bonebois

Priamus used his recently-looted Smoke Grenade to confuse the skeletal advance. Per the published rules, a Smoke Grenade can be thrown 12 inches and will not scatter on a successful ranged attack check. Targets, whether friend or foe, caught in the resulting large blast template (failing to find a definition in the rules, we decided on 6 inches) blindly wander around until they are out of the smoke, using a d10 to randomize the direction of movement and distance traveled (result halved). Here, we made our own call: if a Skeleton stumbled into scenery, it would fall prone and have to use a free move or movement check to stand back up before moving farther.

It just made sense that barely sentient undead would be clumsy. Whether Skeletons with empty eye sockets could really be confused by vision impairing smoke is, of course, metaphysically debatable. Similarly, would Skeletons be effected by a Stun Grenade? How do they draw LOS? The point is, these are all opportunities to make calls during the course of play just as a DM would when running a session of old school D&D. Whatever you decide will probably not "break" Nightwatch because of its inherent flexibility. The system is sound enough to let the players choose whatever seems most exciting or interesting.

And boy would things get interesting soon enough!

Check out the index card "character sheets."

Eventually, the Halflings made it to the second toxic pool and found it guarded by a more capable servant of the necromancer. The next highest level of monster is called a Terror and has a free move plus a 3d10 dice pool. Our heroes decided discretion was the better part of valour and retreated from it after retrieving the shard, but the Terror easily caught up with fleeing Priamus.

Rather than face down the Terror, he jumped into the river and attempted to swim downstream. But failed his check and bumped his head on the stone bridge. He made a check to resist being knocked out ... and failed again! He made a third check to see if he started to drown (i.e., took a wound) as he bobbed unconsciously downstream. Whew, a lucky success. His heavy pack must have weighted him to float face-up.

Here again, there was nothing in Todoroff's rules to indicate whether a PC could do this much less what should happen if the attempt went poorly. We just used our best judgment and found that Nightwatch's fundamental structure easily allowed us to adjudicate the results on the fly. As to what happened to poor Priamus? On the other side of the bridge, a Skeleton fished him out of the river and he had to use dice from his pool to recover consciousness. Again, not in the rules but the rules are so open and sturdy that it was a cinch to seamlessly carry on the adventure even when faced with such unexpected circumstances.

Once Priamus so quixotically escaped the Terror's icy grasp, Adelgrim the Ranger (just barely seen in the top right corner of the picture above) decided to sing an arrow into the imposing skeletal serjant. A hit! And to the player controlling Adelgrim, an unwelcome surprise. He did not know that the Terror, like Horde figures, only had one wound. And where did the fiend reanimate?

SH-T!

Right at the sorcerous standing stone where Reolus and Scudamor had hurried off to commence the ritual of exorcism! Adelgrim, carrying the third of the three shards, soon joined them and the Terror could not stop them from completing the ritual on the first standing stone. But he summoned his silent minions to march through the claustrophobic forest and punish our heroes. Scudamor fell fighting off the undead but not before throwing the shard in his possession to Adelgrim. Reolus likewise prepared to meet his doom, passing off his shard to his fellow Ranger.

The Fall of Reolus

Surrounded (-3 to DD rolls), Reolus could not withstand the Terror and his minions, who carved up the unfortunate Ranger rather than breaking off immediately to pursue Adelgrim. Meanwhile, Priamus in soaking chainmail hastened from the river after defeating the undead warrior who had pulled him out, in a desperate attempt to reach the final standing stone. So much for the merry chase our Halfling Heroes had led the undead warriors on back in the ruins! It was now or never and at the second stone, Adelgrim was fumbling badly through the ritual as the Terror finally caught up with him.

There may come a day when the courage of Halflings fails ...

Priamus the Sodden made it, just in time to retrieve the final shard from Adelgrim and complete the exorcism! The necromantic fires of hatred where quenched in the Skeletons and they crumbled, bones and weaponry alike clattering amid the stony forest underbrush. Our heroes had liberated the bridge from the evil sorcerer's servants but at dear cost. Scudamor and Reolus likewise lay still among the fallen autumn leaves. There would be no further adventure for those brave companions. But to stand up against those who so carelessly underestimate them, a Halfling warrior would gladly pay his life's blood!

So did Nightwatch work for what I wanted? You bet it did.

Todoroff is absolutely correct to characterize Nightwatch as a toolbox. Veteran miniatures gamers might object, "What's the big deal? Any ruleset can support scenario-specific rules." The trouble is, scenario-specific rules are still rules in the sense that you have to invent them beforehand and they need to harmonize with all the other rules at play. What I wanted, and got, out of Nightwatch was a structure that allowed me to make calls rather than apply rules.

To illustrate the difference, let me point out that I could not find any rules for stealth in the book. So what can be done about it? Well, using the approach of scenario-specific rules, I would need to invent a stealth system and playtest it to see if it broke the structure of the game. I was recently brainstorming such a mechanic with a friend where a figure would be considered to have "stealth status" until it failed some kind of push-your-luck roll, which would emulate the tension of needing to be swift but wanting to remain unseen. Maybe we could implement that in Nightwatch.

But what if it just came up during the course of play and we hadn't thought of it before hand (like willfully plunging into a river). With Nightwatch, it would be so simple to make a call, based on the particular circumstances of that moment in the game, that a PC could remain undetected by monsters that hadn't already seen him simply by taking a -1 penalty to his movement check. Or maybe instead of a penalty, his movement while trying to remain undetected would simply be halved. Or rather than either of those things, he would need to make an additional role from his dice pool after making a successful movement check: you moved the full distance but it turns out it wasn't stealthy!

With Nightwatch, I could use any or all of these simple solutions in the course of the same game. Which I picked would just depend on what was going on at that instant, what made sense for that moment rather than what would make sense prospectively for all hypothetical moments. The latter is the domain of rules instead of calls. Calls are for this instance, rules are universal. This is what I mean when I say that Nightwatch, for me, captures the old school D&D feeling I want.

And I definitely did not really need dozens of monster miniatures on hand to get the experience I wanted. Now if you want to play the specific theme Todoroff presents for Nightwatch, maybe you do need that many miniatures. I did not. Just how many Skeletons did the Halfling Heroes defeat? We stopped counting at twelve. That's right, a dozen. Just by recycling Skeleton casualties back into play, we ended up fighting at least twenty one enemies using only nine miniatures to represent them. The gradation between Vermin, Horde, and Terror really helped there.

I also considered allowing the Skeletons to use the same Weapon Skills as the PCs. I didn't go into it above but fighting with a certain weapon allows a PC to perform special tricks. For example, Scudamor was armed with a single shortsword. Therefore, he could make a melee check against a Skeleton that would push the boneman back an inch rather than possibly killing it, avoiding the Skeleton's DD check and freeing him up from having to take a free attack from the Skeleton if he had disengaged from base contact. What if monsters could also use these tricks?

We tried it with the Terror, who had a hoplon and kopis, meaning that on a successful d10 melee attack check he could also make a free d6 shield bash attack check. It made him that much more frightening, although was it necessary considering his 3d10 dice pool? And whether that's too in-the-weeds for minions at large is a question for another day. It's simply another thing to try with this toolbox called Nightwatch. Another simple experiment would be to give a minion monster multiple wounds.

I have some reservations about Nightwatch, of course. For example, what would differentiate an Orc raider from a Skeleton warrior? Even old school D&D has enough granularity to make those enemies meaningfully different. Maybe not so, with Nightwatch. But that's another challenge I'm willing to accept after this excellent first impression.

For another hobbyist's take on Nightwatch, played more "as-intended," please check out this video from Dice Tales on YouTube:


The Back Door to Narâgzâram-gathol

Last September, Scott made some dice and cards for procedural generation of a dungeon adventure. As for the ruleset, we started with Sfiligoi's Sellswords & Spellslingers and mixed in some of The One Ring roleplaying game published by Cubicle 7. The result, with a LOT of innovations during the course of play, is something we called Dungeons Deep & Caverns Old.

I'm not going to get too detailed about our rules, the core of which are lifted out of Sellswords, but the basic framework is that play is divided into Exploration Phases and Encounter Phases. The players each take on the role of a Companion and together explore the dungeon in the former phase and fight off its denizens in the latter.

During the Exploration phase, dice are rolled to determine the size of the dunegon room the Companions enter, how many doors it has, including whether they begin opened or closed, and the content of the room including what kind of monsters. If monsters aren't attacking the Companions, they can also search furniture and, as the case may be, try to detect and disarm traps or solve other puzzles. As soon as monsters appear, the Exploration Phase ends and the Encounter Phase begins.

During the Encounter Phase, the Companions take turns making Activation Tests and take as many actions as successful tests, to a maximum of three. Each failed test results in a draw from the Encounter Deck, which is (partially) how the monsters act. The activation test is made on a d20 and the difficulty is equal to the current Shadow score of the dungeon. The Encounter Phase ends and the Exploration Phase begins when all the monsters either flee or are otherwise defeated.

Shadow is equal to the number of explored rooms plus open doors to unexplored rooms. Other events, some of which are in the control of the Companions (such as smashing down locked doors) also increase Shadow. The idea is, as the Companions venture deeper into the dungeon and arouse the ire of more and more monsters, the strength of the Enemy's servants wax.

But a light shines in the darkness! Each Companion has a stat called Hope, which can be spent to mitigate the Shadow and there is also a pool of Hope, called Fellowship, that can be spent by any Companion. Most Companions add a single point each to the Fellowship pool. But Hobbit Companions, although not always that handy in a fight, contribute two points each to the pool.

A couple weekends ago, the bug hit us again and so Scott wrote up a scenario for a return to the dim, dangerous delvings of Middle-earth.

Before giving, to the best of my memory, a room-by-room account of the quest, let me show you a picture of the overall dungeon at the end of play. Scrolling back up to this picture might help you understand the course of our adventure a little better as I describe it.


The first room is the one directly in the center, with the open door facing the camera's point of view. And that is where we will begin the story of the quest ...
Ulfrid Cleftfoot, Second Underchamberlain of Erebor, has tasked the Companions with recovering an ancient relic of the House of Durin. Said to have been lost 400 years ago during the War of the Dwarves and Dragons, the Hammer of Grór is a valuable heirloom to the Dwarves of the Iron Hills. 
The hammer is believed to be deep within the armories of the lost dwarven hold of Narâgzâram-gathol in the Gray Mountains. Unfortunately, the hold is currently occupied by troops from Mount Gundabad. Entry through the front gates is out of the question due to orc activity. Even the losses of the Battle of Five Armies has not seriously depleted the numbers of orcs infesting that hold. 
Fortunately, an ancient map was unearthed in the archives of Erebor which mentions a back door to the hold, accessible from the its extensive mine workings. These mines can be reached from a little-used and partially ruined outpost. Once the Back Door is found, the Companions could more easily enter the hold. 
The Companions have journeyed through the foothills of the Narrows of the Forest for weeks, and have finally reached the outpost. A dark and crumbling portal hidden behind scrub and bushes awaits them ...
Five Companions joined the quest for the outpost: a Dwarf Warrior of Erebor, a Smuggler out of Laketown, a Woodman of Wilderland, a Ranger of Mirkwood, and Loremaster of Rivendell.


The First Room was deserted and seemingly long disused. The Companions found doors on either side of the entrance, which for convenience's sake we will call to the east and to the west. The west door was locked and rather than fiddle with it too much, we decided to open the east wall portal. Note the open door to the dungeon itself does not count toward the Shadow score.


The Companions found no monsters guarding the Second Room, either. But they did find three ancient tombs, protected by cunning artifice of ancient Dwarven-make. The Loremaster recognized one of the tombs as a Dwarfriend of old, a rare Man who earned the respect of the grim folk of Aule. His grave, however, had been disturbed. Perhaps some relic of his friendship with the Dwarves might be found deeper in the outpost?

As you can see in the picture, indicated by the black d12, the First Room, the Second Room, and the open doorway in the north wall of the Second Room add up to Shadow 3.


The Companions heard skittering and snickering through the open door to the north and discovered, in the Third Room, an ancient scriptorum covered in thick sheets of cobweb. Giant Spiders lurked in the dark corners of the ruined repository of lore while their Goblin herders goaded them on. After making short work of these pests, the Companions opened the door on the eastern wall of the scriptorum.

Because the second door of the Third Room began closed, the Shadow remained at 3. This is because open doors between explored rooms do not add to the Shadow. While Shadow is low, it is easy to risk taking all three activation tests per Encounter Phase round per Companion. So early on, the Companions have a pretty easy time of it. But as the Shadow grows, it gets harder for the Companions to pass activation tests and correspondingly easier for the monsters to act or for other nasty surprises to crop up.


The Fourth Room was a narrow corridor dominated by a fountain, which appeared to water the hideous giant spiders as well as a Cave Troll!

Most monsters in DD&CO, called Minions, appear and act in groups. But more powerful monsters act alone. Both these Loners and Minions have a certain amount of Hate points, the counter to the Companions' Hope and Fellowship, which are spent to make powerful attacks or activate other monsters. The Cave Troll, for example, can make a sweeping attack against multiple Companions. Provisionally, Minion groups also flee when they are reduced in numbers below their starting Hate points. Unlike Minions, Loners can only be wounded by critical hits.

With the Cave Troll and Giant Spiders defeated, the brave (or foolish?) Woodman drank from the fountain - which meant rolling on a table to see what happened! Just normal water this time ...


Through the open portal on the north wall of the Fourth Room, the Companions entered another narrow corridor, the Fifth Room, littered with the ancient bones of Dwarves and crawling with Goblins. After dispatching the Goblins, the Companions decided to double back to the Fourth Room and try the closed door on its south wall. The open door the Companions left behind counts for the Shadow score, which is at this point 6. The final room and encounter of the dungeon appears when the Shadow reaches a number pre-determined by the scenario, in this case 11.


The south door in the Fourth Room proved locked and the Companions could not pick the lock so we smashed down the door, bringing the Shadow up to 9! Behind the ruins of the door was a quiet library, the Sixth Room, where a couple of Goblins uselessly perused the Dwarven codices. Although these Goblins were handily defeated, there was so much to search in the library that we needed to make several Wandering Monster checks, which need to be made once per full round of Companion actions during an Encounter Phase. We ended up getting bogged down as several patrols of orcs and eventually the Gundabad Captain himself appeared!

So how do the monsters defeat the Companions? If any Companion is slain, everyone loses. Companions have several stats that track their condition during an adventure. Each has an Endurance and a Fatigue stat. Endurance works like HP; successful monster attacks reduce it. Companions also start with a certain amount of Fatigue based on their equipment but can gain Fatigue points during the adventure from certain monster attacks.

Once Endurance is reduced below Fatigue, a Companion becomes Exhausted and can only attempt one activation per Encounter Phase round. Once a Companion reaches zero Endurance, he becomes Wounded and cannot take any actions or recover any Endurance until healed. A Companion can be healed once per adventure and any Companion can attempt to heal another, although some are better at attempting it than others. If a Companion becomes Wounded after having already been healed during the adventure, then he is slain.

As mentioned above, Companions also have a Hope stat and Hope points can be spent to do various things like reroll dice or temporarily reduce the Shadow score. Hope cannot be recovered during an adventure, as a general rule. Additionally, Companions have a Despair stat which starts at zero but Companions can take Despair points as a result of various events, including seeing a Companion being Wounded or taking special attacks from certain monsters. If Hope is reduced below Despiar, then the Companion becomes Miserable and can no longer spend Hope or Fellowship points.


Having been pretty worn down in the Sixth Room, the Companions finally managed to forge ahead through its open north door into a smaller, grimier space. Lit by greasy campfires billowing stinking smoke up into a shadowy rift in the ceiling, we found the den of some Hunter Orcs and their disgusting pets from the chasm above - Giant Bats!

Because this Seventh Room had two open doors, Shadow now rocketed up to 11 (please no Spinal Tap references ...) meaning the last room lay beyond whichever of the two open doors the Companions next explored. But first there was the matter of the monsters. At Shadow 11, the Companions now had a less than 50% chance on each activation dice and the monsters correspondingly acted more often than ever.

We spent some more of our Hope and Fellowship points to try and mitigate the odds a bit, although we were mindful that whatever waited for us in the final room would probably require those resources, too. Still there was no getting to the last chamber without clearing this one and after a tough but efficient fight we crossed the penultimate threshold ...


Dominating the entrance to the mines of Narâgzâram-gathol sprawled a dark bubbling pool of sludge in which wallowed a foul wyrm! And as he uncoiled his slime-slick, scaly body to rear up in anger, a fell light shone from his awful slit pupils. A deathly miasma wafted off the disturbed scum of the pool and with a sickening burble, the corpses of dead men rose from the waterline. As the malignant drake gaped its hideous jaws, a whirl of black screeching bats descended from the ceiling to encircle its glistening head like a living crown of darkness.

None of us had a painted Cave Drake from GW so Scott used a charming old Grenadier sea serpent he recently found somewhere or other.

A roar of "Baruk Khazâd!" went up as the Dwarf Warrior, enraged to find such a filthy abomination coiled in the depths of the hold of his people, charged forward to strike at the wyrm before any others had gathered their wits enough to act. Soon enough the Loremaster was at his side, trying to carve through the shambling dead men, as the other Companions poured shots into the drake or else maneuvered into the room. The Smuggler charged in bravely but was scooped up by the Giant Bats and dumped into the muck. Again and again, the hideous beast's throat puffed up a spewed forth sickly greenish flame, as the Companions dodged its snapping maw.

At last the brave Dwarf Warrior of Erebor, his shield shattered and blood running from rents in his mail, sunk down to one knee. He had cut a few rents into the living armor of the horrible wyrm but it looked to have the better of him. Just as its open jaws darted toward him, and he steeled himself to go to his fathers in glory, the lunging head fell away with a deafening shriek! As its lifeblood spurted from its cleaved neck, the dead animated by the dragon's magics sunk into still piles of decay.

Game-wise, this final encounter was harrowing. Scott designed the dragon to use a breath attack whenever a Compion failed to hit it with an attack. But like all dragons of Middle-earth, this one had a weakness. After each breath attack, the critical range of successful hits against it doubled. The trouble was, every time Scott's Dwarf Warrior attacked, he missed, resulting in all of the Companions getting hit with the breath attack. Still, Scott stubbornly attempted to attack it.

It's possible, with some extremely bad rollings, for a Companion's shield and armor to break. Scott's poor Dwarf suffered both misfortunes! When the Dwarf seemed doomed at last, I rolled three activation tests and made all three. With my Elf's first action, I cut down a Dead Marsh Spectre blocking my path to the wyrm. With the second, I moved in. And with the third, I raised my Elven Great Blade - and landed a critical hit to impart the final wound!

In the wake of the battle, the Companions found the dragon's somewhat modest hoard and amid the gold and gems, we found the relic of the Dwarfriend who's tomb we had recognized in the Second Room. It was a shield, a perfect replacement for the one Scott's Dwarf had lost. We will undoubtedly give it some special rule - maybe Unbreakable?

I haven't had such fun gaming since I first started this crazy hobby as a kid. DD&CO is, in my opinion at least, a complete success so far.