Showing posts with label rule sets. Show all posts

[Test Driving] Conquest: The Last Argument of Kings

My friend Kevin and I pre-ordered the first wave of product for Conquest: The Last Argument of Kings, a rank'n'flank mass battles game designed by Alessio Cavatore and published by a Greek company called Para Bellum. The "core box" is a two-player starter set featuring the Hundred Kingdoms and Spires factions. The former are your standard medievalish humans and the latter are decadent space aliens, otherwise known as elves.

This past weekend, we finally had a chance to break out the core box forces and try out the rules. We settled on a 10-round match without objectives, just to ease into the mechanics. I consider this a "test drive" because we were only trying to destroy one another with no other, more complicated goals to drive strategy and tactics and because we used a very small number and variety of the units available to the factions.

In Conquest, all units are categorized as Light, Medium, and Heavy class. Armies encounter each other gradually over the course of first five turns of the game, starting with Light regiments scouting out the battlefield before the hardier ones march out. Below is a picture of Turn 3 from our test drive. I'll describe how we got to this point over the first two turns in detail, sketching out some of the fundamental mechanics of Conquest.


To deploy Light regiments on Turn 1, the players need to roll a 3+ for each. Mercenary Crossbowmen and Force-Grown Drones (hereinafter "FGDs") are the Hundred Kingdom and Spires Light regiments included in the core box, respectively.

Kevin successfully rolled to deploy his Crossbowmen (who are literally un-armed; Kevin didn't have time to finish assembling them) from his table edge while my Force-Grown Drones ("FGDs" for short) apparently decided to hang back. 

Players can start rolling to deploy their Medium regiments on Turn 2, needing a 5+. You still need to roll a 3+ to deploy Light regiments on Turn 2. The core box comes with two Medium units for the Hundred Kingdoms: Men-at-Arms and Household Knights. There is only one Medium unit in the core box for Spires, the Brute Drones.

On Turn 2, Kevin successfully rolled for his Household Knights and I did the same for my Brute Drones. The Men-at-Arms and FGDs must have still been en route. The Crossbowmen advanced forward toward a low wall dividing the battlefield and the Household Knights rode up behind them. In Conquest, you can charge through friendly regiments so long as the end position of the charging unit doesn't overlap that of the friendlies. My Brute Drones marched up behind a stony patch of bush to gain some cover from any potential crossbow fire.

Any Light regiments that have not previously been deployed automatically march on the field on Turn 3. Medium regiments pass their deployment test on 3+ on Turn 3. My surly FGDs finally arrived (far left in the picture above) and Kevin succeeded in bring on his Men-at-Arms (not pictured above, with apologies to the reader) to meet them.

A few notes at this point:

First, every unit in your army has a corresponding card which goes into your Command Stack. At the beginning of each turn, you put the cards representing each unit in the order that you want to activate them. The players take turns drawing cards from their resulting Command Stacks.

Second, characters in Conquest must enter the battlefield as part of a regiment of the same type as them. In addition to class (Light, Medium, Heavy), every unit also has a type (Infantry, Cavalry, Brute, Monster). In the core box, the Hundred Kingdoms character is a mounted Noble Lord (who has type Cavalry) and so must come onto the field with the Household Knights. The Spires character in the core box is the Pheromancer (who has type Infantry) and enters the field as part of the FGD regiment.

Characters have their own cards in the Command Stack but do their moving and fighting along with whatever regiment they have joined. When their cards are drawn from the Command Stack, they can use certain abilities (like spells) or take special character actions (such as challenging an enemy character to a duel, in certain circumstances). Many of these abilities involve changing the order of the Command Stack, so you need to take this into account when building the Command Stack at the beginning of each turn.

Third, and this is extremely important, deployment zones change as regiments march deeper into the battlefield. Heavy regiments may deploy from any edge of the battlefield behind your forward-most Medium or Heavy regiments, which has not itself been surpassed by an enemy regiment. Light and Medium regiments likewise deploy from any edge behind your forward-most Light, Medium, or Heavy regiments. This means destroying enemy regiments or even just marching past them can have the greater impact of disrupting your opponent's ability to bring reinforcements into battle from as far forward as they might otherwise deploy. It also means you have an incentive to get your forces moving up into position rather than hanging back.

With those points explained, I can get into the whys and hows of the picture of Turn 3 above.

I won the initiative roll at the top of the turn and so marched my Brute Drones up toward the Crossbowmen. I knew they would have to take some fire but wanted to get my deployment line deeper into the field for when the FGDs came on. Kevin responded by moving his Household Knights behind the Crossbowmen, no doubt hoping he would win initiative on Turn 4 and be able to charge the Brute Drones through his Crossbowmen after shooting them on this turn.

Seeing the Knights committed against the Brute Drones, I brought in the FGDs from my new deployment line behind the Brute Drones, hoping to tempt Kevin to respond by deploying his Men-at-Arms against them, which he did. I marched them onto the low stone wall mentioned above. Without going too far into the terrain rules at this point, I was hoping to tempt Kevin into charging me over the wall but we'll come back to that. In the meantime, Kevin unleashed a full volley of aimed bolts at my Brute Drones, killing one of the Brutes. I wasn't too worried with two left, just as long as I could win initiative on the next turn.

At the top of Turn 4, I succeeded on my 5+ deployment test to bring on the Abomination (type Monster, class Heavy). And, unfortunately for Kevin, I also won initiative! The two remaining Brute Drones duly smashed into the Crossbowmen and destroyed the entire unit.

Importantly, "Charge" is not an attack action. Every regiment can take two actions per activation and the only action that can be taken twice in an activation is "March." The Charge action is a move equal to the regiment's March value plus d6 inches. Charging into a regiment prevents that unit from being able to Charge that regiment. But the Charging regiment will need to have another action remaining after the Charge to attack, or "Clash." If the regiment Clashes after Charging, it makes Impact attacks on top of its normal attacks to the tune of one half (rounded down) of its normal attacks.

Every successful Impact and Clash attack triggers an injury roll by the regiment receiving the attack and any unsaved result in wounds. Then the regiment that received the attacks must make a resolve test for each unsaved wound with each unsaved resolve test causing an additional wound! This can make charges against regiments with low Resolve stats absolutely devastating, as Kevin's Crossbowmen found out! (Note: Wounds taken as a result of ranged attacks do NOT cause Resolve tests, making Conquest impervious to "gunline" army lists!)

But with the Crossbowmen wiped out, Kevin took his revenge and charged the Brute Drones with his Household Knights and Noble Lord, handily wiping them off the battlefield. Next, I deployed the Abomination up behind the portion of low wall at the very center of the battlefield, hoping that I would either tempt Kevin to once again Charge over a wall (which is even more dangerous for Cavalry type regiments) or force him to maneuver around it and miss his Charge in the case that I lost initiative at the top of Turn 5.

Kevin deployed his Men-at-Arms from his right flank edge and attempted to Charge my FGDs before they scurry back over the wall. But he rolled a 1 on his d6 and just barely missed it. Turn 4 therefore ended with the lucky FGDs backing up and putting the wall between themselves and the grim Men-at-Arms.

Kevin won initiative on Turn 5 and wheeled his Household Knights around to get into position, basically trying to prevent my abomination from Charging into their flank, which as in all rank'n'flank games is an especially effective attack. Nevertheless, I charged my Abomination into their front rank, eviscerating one of the Knights.


Perhaps regretful that he did not simply take the risky charge over the wall against the Abomination, Kevin steeled his resolve on his right flank and charged over the low wall at my FGDs. Terrain is wonderfully simple in Conquest. There are a few generic rules that can be assigned to the terrain you are using at the beginning of the game. For the wall, Kevin and I decided we would apply the Broken Ground and Hindering rules. In a nutshell, this made the walls dangerous to Charge across.

Kevin's Men-at-Arms not only lost their Impact attacks because they charged across the wall (Hindering) but also needed to make a test for every stand of figures in his regiment that charged across the wall (Broken Ground); in this case, all six stands! The Men-at-Arms took three casualties before making contact with the FGDs, a tremendously unlucky roll.


The Clashing Infantry regiments pictured above pre-casualty removal. The terrain doesn't actually appear in the picture because we had to remove it, considering the Men-at-Arms were attacking from on top of it. Note that the core box contains six stands each of Men-at-Arms and FGDs and they can be taken in regiments of three stands. But the core box only comes with one card for each, meaning you can't actually use them as separate units right out of the box. This is my only real complaint about the core box.

Back to the action:  FGDs are a really awful unit, to be honest, just considering their stat line. They are bad fighters and they are very easy to kill. Kevin's charging Men-at-Arms removed two and a half stands of six. Fortunately for them, my character the Pheromancer had joined their regiment. And the next card I drew was the Pheromancer, enabling me to heal d6 wounds on the FGD regiment and return one of their vanquished stats. Kevin then drew his Noble Lord card but had nothing to do with him. Lastly, I drew my FGD card and Clashed against the Men-at-Arms with negligible results.

At the top of Turn 5, I once again lost initiative and made a big mistake. One of the characters in your army must be assigned as your Warlord and each character type has a specific Supremacy ability it may use if it is your Warlord. The Pheromancer's Supremacy ability is to give +2 Resolve to ALL of your regiments, making them that much more resistant to taking casualties as a result of failed Resolve tests. But I clean forgot about this!

Kevin began the turn by attacking the Abomination with his valorous Household Knights. Even without the benefit of Impact attacks, they were able to take out half of the Abomination's wounds. I then drew my Pheromancer card and once again healed another d6 wounds on my FGD regiment, taking them back up to their original six stands! (But that sixth stand was comprised of only one out of four Drones ...) Kevin then Clashed against the FGDs to good result, removing two of stands I had just replaced.

I then drew my Abomination card and attacked the Household Knights. This time, I did even better and killed the two remaining Knights. When the regiment that a character has joined is removed, that character is also removed! The silver lining is, if that character's regiment had not yet acted, the character gets to make some parting attacks. That did not apply in this case, as the Household Knights (and the Noble Lord accompanying them) had already attacked at the top of Turn 5.

Finally, the remaining FGDs counterattacked the Men-at-arms, inflicting exactly one or two casualties.

At the top of Turn 6, I once again forgot to use the Pheromancer's Supremacy ability ... But I did win the initiative and drew my Pheromancer card, once again returning two stands to the FGD regiment. Kevin responded with his only remaining unit and the Men-at-Arms attacked to devastating result:  A regiment that loses half or more of the stands it began that turn with gains the Broken condition. This isn't that bad per se but if a Broken regiment would become Broken again it then becomes Shattered, meaning it is removed in its entirety.

Meanwhile, the Abomination laboriously turned around to line up against the Men-at-Arms' flank but even this tremendously fast monster could not get that far across the battlefield after wheeling around. To finish up, the FGDs again achieved exactly nothing against the Men-at-Arms.

I again won initiative on Turn 7 and again forgot to use the Pheromancer's Supremacy ability. But I did realize at this point that the Pheromancer's healing ability was neither limited to the regiment he joined nor by any range restriction. I therefore healed the Abomination back to full health to take on the Men-at-Arms!


And that's when I realized I had made an even bigger mistake than forgetting my Pheromancer's Supremacy ability on the previous turn. Rather than making my useless attack on the Men-at-Arms, I should have used the Rally action to get rid of the Broken condition on the FGD regiment. I simply didn't know that there was a Rally action. Oh well, that's what test drives are for, right?

Back during Turn 6, when the Men-at-Arms clashed against the remaining three stands of the FGD, they inflicted enough wounds to remove two more stands but NOT to outright wipe out the regiment. I was elated because this meant the Men-at-Arms would not be able to reform to avoid a flank attack by the Abomination. But since removing two of three stands was enough to again inflict Broken on the FGD, they became Shattered and had to be removed entirely along with the Pheromancer!

Kevin then reformed his Men-at-Arms for a brave last stand against the Abomination. Over Turns 8 and 9, the Abomination leisurely took them apart, resulting in victory for the alien Spires forces. It's not that the Men-at-Arms had no chance against the monster; but they would have needed to roll better than they did on both their Clash and Resolve tests, and the Abomination has special rules that allow him to tear through its victims armor and reduce their Resolve stat.

Preliminary Conclusions

I really enjoyed this test drive. Perhaps typical of Alessio Cavatore's designs, many meaningful decision points emerge from a fairly simple and straightforward rule set. Kevin and I did not encounter any questions that we could not answer by fairly quick reference to the rule book. The highlight was certainly the moving deployment zones. I am really excited to play around with the implications of that mechanic. I also loved the terrain rules, which were very simple to understand and created interesting tactical opportunities and challenges without overdetermining the shape of the game play.

Some thoughts about the Spires units:

Weighed up dispassionately, FGD have a bad stat line, sure, but as you can see they aren't meant to assault so much as to tarpit and with the support of a Pheromancer (even one played as badly as I did) they are pretty damn good at their job. The Men-at-Arms are no joke and the poor FGD survived three rounds of combat with them. Of course, putting that wall between them also helped.

I didn't talk very much about the Brute Drones above but they are suitably impressive and I don't blame Kevin for deciding to deploy his Household Knights against them. Paired with the Abomination, it is hard to know where one should concentrate; if allowed to operate together, they are capable of all sorts of hammer-and-anvil shenanigans.

Speaking of the Abomination, it is truly terrifying (and even has the Terrifying special rule). With a March value of 10 inches, Resolve 4, Defense 3, and 10 attacks ... well, the only saving grace is that its Clash value is merely 2 (meaning it normally only hits on 1s and 2s). This thing is only available as a Restricted choice for the two Spires characters that can legally bring it to the table.

The Pheromancer is the weakest Spires character and he's nothing to write home about in terms of his stat line. For those playing out of the core box, be aware that he is doomed if the Noble Lord manages to call him out in duel. But his Accelerated Hibernation ability pairs wonderfully with the FGDs, as you can see in this report. That ability, however, is not as wonderful in a list with lots of cards in your Command Stack, or at least that's my hypothesis.

Rogue Stars Overview

I was not excited for Rogue Stars until reading through a copy of Advanced Song of Blades and Heroes this past fall. Having purchased, digested, and ultimately disliked the revised edition of SBH back in 2014, I had pretty much written off Ganesha Games. But whereas Revised was a near miss, Advanced turned out to be a near hit - thanks to reactions. So I pre-ordered Rogue Stars hoping that Andrea Sfiligoi had continued along the design trajectory toward my preferences.

He did not disappoint!

oh man look at those space men go

By using a d20, Rogue Stars has plenty of room for modifiers and can afford to eschew stats altogether. Characters (i.e., models) are defined entirely by Traits. Each player has 200XP to create a Squad of 4-6 Characters and must spend 30-70XP on each. Squad creation begins with selecting a theme. What kind of Traits and equipment are available to your Squad at the outset depends on which theme you choose. Themes come into play elsewhere - for example, Pirates and Mercs get extra XP for looting treasure chests. Finally, each player chooses a Tactical Discipline for their Squad, a special rule that applies to all the members, such as being able to re-roll a morale test.

Expect Squad creation to take a while - Rogue Stars is chock full of Traits and all kinds of equipment. Themes help narrow your choices but there is still a lot to think about. Folks who prefer a WYSIWYG approach over hunting down the most competitive builds will find plenty of options for bringing to life whatever miniatures they use. I have no idea whether there are game-breaking combos in Rogue Stars and honestly don't care; I plan to use this game to tell stories rather than run tournaments. But I have no doubt that some mouse will find the cheese, given such a wealth of options.

There are three tables - mission, location, and complication - for rolling up scenarios. Each has twenty (!) options. Aside from just terrain and weather, there are also rules covering gravity and exotic atmosphere conditions. There is a whole table for determining the consequences of firing projectile weapons aboard spacecraft. And there's another table for randomizing what sort of wonders and perils you might face while exploring a derelict. There is plenty of support here for having all kinds of space adventures.

Once the Squads are assembled and the scenario is set up, players roll off for initiative. The winner is the active player. The active player attempts to activate her Characters one at a time by taking an activation test - rolling up to three d20s. For each roll that is 8 or above, after applying modifiers, the character may perform a single action. She may use any or all of her available actions but the Character gets a stress token for each action performed. Each stress token grants a -1 modifier to subsequent activation attempts.

The active player can attempt to activate any or all of her Characters as many times as she pleases. But the more dice she rolls, the more rolls she may fail. Each modified roll below 8 grants the non-active player a Reaction Die. The non-active player may used Reaction Dice to attempt to activate his Characters. If he succeeds, his Characters can act before the active player gets to perform any actions with the Character she is activating. So "reactions" are really more like interruptions. Just like with actions, Characters take a stress marker for every reaction they perform.

One very important type of reaction is making a Take the Initiative roll. The non-active player needs to roll a 16 or better, after modifiers. He becomes the active player if he succeeds but the newly non-active player removes all stress markers from her Characters. Losing the initiative is the only way to remove all of the stress tokens on all of your Characters. The active player does not have to wait for the non-active player to roll a successful Take the Initiative reaction; she can simply pass initiative whenever she chooses.

Everything in Rogue Stars is a d20 roll and that includes combat. The basic TN for a ranged or melee attack is 10 - but there are many, many potential modifiers, taking into account everything from cover to weapon quality to making called shots. (Yes you can go for the headshot, at a 30% penalty. And yes, headshots can be lethal.) If an attack is successful, the target determines hit location (unless it was a called shot) makes a damage roll. This roll is modified by the amount of damage the attack inflicted, whether the target is protected by armor, whether the target is already wounded, etc. The result may take the target out of action (OOA), or may result in pin and/or wound markers, or may require a roll on a further table that breaks out the wound by hit location and wound severity. That includes Character death!

Melee is a somewhat more complicated than ranged attacks. Being outnumbered, knocked prone, making Powerful Blows, and trying to disengage ... there are rules covering it all. But my prediction is, ranged attacks are sufficiently deadly to render melee rare absent boards truly covered in terrain. Then again, there is teleportation in Rogue Stars ...

As a final note, you don't get your money out of a d20 mechanic without critical failure and critical success. Rogue Stars covers both for all sorts of rolls, including Activation. There is even a critical failure result for firing a pistol in melee - you manage to shoot yourself in one of your legs, of course! That's an example of how gritty these rules get and no doubt there are lots of things to remember. Fortunately, Osprey has promised a QRS is on the way as one is not included in the book itself. Probably due to the constraints of the series, Rogue Stars also does not use the usual SBH  mechanic of set distances.

I am really looking forward to playing Rogue Stars in 2017! The older I get, the more I want to play low model count games with a heavy narrative ("RPG creep"?) and this ruleset seems perfect for that. I know some folks are already put off by the complexity but I don't think Rogue Stars really qualifies as complex. The structure of the game itself is as streamlined and intuitive as SBH. I know that is small comfort for gamers allergic to modifiers. If you're one of them, best to stay away. But Rogue Stars is a great bet for anyone looking for a simple game that is crunchy enough to really bring the character out of the minis.

Strange Aeons Overview

Teri 
It does not take that long to play, like an average game takes what ... ? 
Uncle Mike 
I'd say fifteen to forty five minutes. And that was totally intentional because a lot of my friends have really, really short attention spans and a lot of games just take way too long to play. 
see full interview 
How 'much' attention span can a designer assume that players have? This isn't really a matter of how long a game takes but rather of how much play we get out of time spent on a game. In other words, a player with a short attention span probably has unconsciously high standards. So "Uncle Mike" Atkinson was forced to design a game that meets the high standards we don't know we have.

The result is a d6-based skirmish game with an extremely low model count called Strange Aeons (hereinafter SA). It is for miniatures gaming what Call of Cthulhu is for roleplaying games, and not just in terms of genre. That RPG upended the power fantasy of Dungeons & Dragons by focusing on characters breaking down rather than "leveling up." Similarly, SA disregards the usual 'plot' conceit of skirmish campaigns, that warbands exist to dominate one another, and instead charts the rise and likely fall of mere mortals who dare gaze into the abyss.

WARNING - may cause SAN loss

In a given game of SA, one player controls the protagonists - agents of the "Threshold" organization (think pre-WW2 Delta Green) - while the other controls the antagonists, or "Lurkers." Generally speaking, only Threshold characters develop over the course of a campaign. A new Lurker list is written up for each session, representing fresh horrors. SA envisions the players switching roles after the first game and playing a second, but this is not required. If someone only wants to play Lurkers, that is fine. But the default assumption is that the players will essentially be running two campaigns simultaneously.

This is possible because the mechanics are clear and efficient. Six stats define any given figure: Movement, Dexterity, Constitution, Attacks, Wounds, and Resolve. These interact economically to produce quick results. Just to pick the obvious example: Close combat is an opposed d6 roll, with each combatant adding the Close Combat Bonus of the weapon used. The difference is the number of hits the winner landed. The winner then rolls that many dice to wound, adds a weapon-based damage bonus to the highest result, and the difference between that and the target's Con stat equals how many wounds the target suffers. I won't go into further detail; suffice it to say that all the resolution mechanics are this direct.

The final game mechanic I'll note is activation. Each player may only activate ("nominate" in SA) a single figure per turn. Certain figures have the Command skill, which allows them to nominate allied figures within a certain range. A wealth of tactical possibilities arise from this simple limitation - and that is my definition of design elegance. SA is one of those games that makes others seem unfocused and wasteful. But the true beauty of SA is how the stark efficiency of the game mechanics contrasts with the truly luxurious campaign support.

Permanent Injury, Advances, Equipment Lists, Spells, Monsters, Scenarios - these elements are not merely present and it's not just that there are a ton of options and outcomes, but everything included is also of good or better quality. I could go on and on with "there are even ..." type statements. I'll limit myself to mentioning that there are six basic scenarios (not counting variants), nine advanced scenarios, and sixteen (!) quest scenarios that can be unlocked by collecting "map pieces" during the basic and advanced scenarios. Oh and there are 50+ pages of Lurkers, not including a further raft of options the Lurker player can use to make things even worse for the Threshold agents.

I simply cannot do justice to the content of the SA 2nd ed. rulebook in a few paragraphs. It is easily the gold standard for miniatures skirmish games in terms of campaign support. Considering the simplicity of the rules and the low entry requirements as far as models and terrain go, this could be almost anyone's first miniatures game. But at the same time, I think it will exceed the expectations of veteran campaigners. I should note that I intend to use SA as a toolbox to run several limited RPG-style campaigns for my friends:

- local police stumble across a strange cult in rural Virginia
- intrepid Mounties encounter the horrific truth behind First Nations legends
- marooned ne'er-do-wells confront South Seas cannibals - and far worse ...

I already collected about 40 or so miniatures to cover all three campaigns!

You can obtain your own copy here.

Empire of the Dead Overview

Pax Britannica! Ushered in by Wellington's triumph, the apogee of this gloriously British century was no doubt the latter reign of Queen Victoria. The power of Her Majesty's servants not only stretched to the far corners of the Earth but was practically irresistible everywhere. Empire was not then a dirty word, or at least not such a dirty word as we now assume. And even despite everything that could be (and regularly is) said against the Victorians, it is impossible not to take some inspiration from the romantic image of their lives and times.

For me, such inspiration can be boiled down to a few names: Dickens, Doyle, Kipling, Stoker, Verne, Wells, etc. Their work is unanimously haunted by darkness. Indeed, it is the prerequisite for the Victorian hero: "There are dark shadows on the earth, but its lights are stronger in contrast." The predominating tone therefore must be dark and superstitious. Certain interpretations of these men's work especially evoke their basis in the uncanny - and manage it with subtlety:

Indubitably.

Empire of the Dead (hereinafter "EotD") definitely embraces the fundamental darkness of Victorian literature, although it is influenced toward the techno-fantastical by Alan Moore and the steampunk vogue. To borrow Tolkien's icy phrase, I cordially dislike steampunk. Colonel Moran's air rifle is quite far enough for me, thank you.* Alas, steampunk is a core conceit of the EotD setting: The mysterious element "Infernium" (I think we Americans call it Ghost Rock, no?) drives a new industrial revolution. And of course the mystical forces push back. The result is begoggled bobbies deploying Gatling guns against werewolves amidst fog and cobblestones.

A rather tired concept, honestly. It is nonetheless what one might call "Strange Aeons by Gaslight" - that is, a low model count skirmish game with a robust campaign system. As someone more interested in the unfolding story than the gameplay in se, this is fast becoming my preferred 'scope' of miniatures gaming. But I am a gamer, after all, so I do care about mechanics. Along those lines, EotD seems sturdy if unoriginal.

EotD is played in turns each comprising four phases: maintenance, initiative (roll off), action, and combat. Movement, ranged attacks, sorcery, etc., all occur during the action phase on an IGOUGO basis, unfortunately. Melees are fought in the combat phase in an order specified by the player with initiative. Given how few models make up each side's warband, the tried and true (and boring) IGOUGO structure is not a deal breaker. But, for the very same reason, I'd prefer a more complex structure- maybe one built around reaction mechanics?

A starting warband comprises around seven to ten figures. You have 150 shillings to staff and outfit your warband, where the most basic unequipped figure costs 10 shillings. More powerful figures cost 15-35 shillings before equipment. Each faction has an equipment table plus there is a generic table, which all factions can access, and an exotic table accessible to some types of characters. There is an excellent granularity and variety of mundane equipment (e.g., a crossbow has different stats from a hand crossbow) plus the VSF/steampunk gear not only has neat effects but some items can also hilariously malfunction.

Each figure is defined by nine stats, and they are exactly the ones you would expect: Move, Combat, Marksmanship, Strength, Fortitude, Attacks, Wounds, Bravado (i.e., morale), and Arcane. The "standard human" statline appears to be:

This will set you back 10 shillings.

The highest base combat stat in the game seems to be 7 (the top-tier Werewolf and Vampire heroes have Cbt 7 and Arc 7 respectively). To do most things, including hitting in combat, you need to roll over a target number (more specifically, melee combat is an opposed roll) on a d10, adding the relevant stat and any modifiers. Some people say the d10 is better for skirmish gaming than the d6 but is the ability to modify rolls by 10% rather than 17% that important? This is not a rhetorical question. I suppose it also allows for finer tuning on the statline, although the significance of that is also questionable.

In any case, whether an attack inflicted a wound is determined by reference to a chart (Strength versus Fortitude). Ho hum. As soon as the figure takes its last wound, the severity of the injury is determined by reference to another chart, rolling as many dice as the number of wounds the figure took. Only the most severe injury result counts.

The range of injury results is a good balance between simple and interesting. The figure might be unaffected or might be removed from play - but it could also become Discombobulated or, worse, go Down. Without going into detail, both conditions limit what the figure can do in subsequent rounds, although an already-downed figure that rolls another Down result is automatically removed from play. Downed figures have a chance to recover during the next maintenance phase and, if unsuccessful, subsequently. Figures automatically recover from discombobulation at the beginning of the next maintenance phase.

Figures removed from play or who end the game Down must roll on the Campaign Injury table. There is a 30% chance of no serious injury and a 5% chance of death. There are ten other possible results, including some that require a roll on a further chart. For example, the figure may end up psychologically Unhinged and, there is a 10% chance that the condition could eventually worsen to the point of meriting commitment to Bedlam. This is what I mean by a robust campaign system.

And there's much more to it than getting hurt, going insane, or - yes this can happen - being deported from Great Britain. You can also capture enemy characters and sometimes even convert them to your cause. You can visit doctors for healing, although some of them are just quacks that will make your ailments worse. You can sell loot to pawn brokers. Your characters can even get better, earning better stats and new skills - the grunts can even be promoted to heroes!

There is also a solid scenario creation system: a table of five missions and a table of five locations - plus some minor rules differences depending on whether the game takes place during the day or night. (Most EotD vampires don't care for the sun.) Finally, players can buy "Unusual Occurrences" to affect certain aspects of the scenario, including rolling in the notorious London fog and riling up an angry mob.

This is where EotD really shines. This kind of campaign support is far more important to me than whether the fundamental mechanics are novel or, God forbid, actually innovative. (Too many rulesets are falsely advertised and reviewed as "innovative.") As far as the setting, and therefore the miniatures, go ... I find steampunk repellent but EotD does not lean so hard on those tropes that I can't overlook it and even, to some extent, get into it. The idea of man-portable Gatling guns is acceptable in a setting where gentlemen sorcerers can summon a mob of Victorian zombies. The seemingly obligatory "Tesla Projector," however, is pushing it. Thankfully for me, EotD is more about Gothic horror than strapping superfluous goggles onto everybody.

With all that in mind, how excited am I about playing EotD? I think this speaks for itself:

This will set you back considerably more than 10 shillings.

* But what about the Nautilus? In his place and time, Nemo's technological achievements were the exception rather than the rule. Steampunk assumes the reverse, which is exactly my objection.

Most impressive!

Metal King Studio is a one-man company owned, managed, and, er, staffed by Sean Sutter. Mr. Sutter ran a successful Kickstarter to fund his skirmish game Relicblade in February/March of this past year. The game shipped by late June, which is to say, exactly on time. For those interested in backing punctual crowdfunding projects, Mr. Sutter plans to run another Kickstarter next month to fund further Relicblade content.

But let's not start by getting off track ...

Relicblade is now available directly from Metal King Studio in its constituent parts: currently, a small range of Heroic 32mm miniatures and delightfully illustrated cards and rulebook. But its most cost-effective form is a two-player boxed set. Note: this is not a starter set in the conventional sense, i.e., a taste/teaser of the game. To the contrary, this boxed set comes with everything you need to enjoy a full game of Relicblade (well, apart from the terrain).

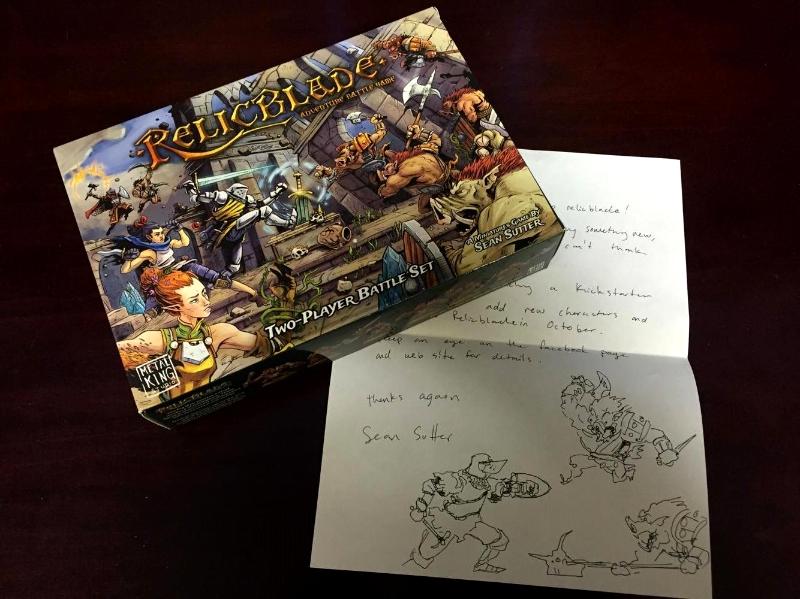
I ordered a copy earlier this month and received it promptly, just as one would expect from a KS creator who managed to deliver rewards on time. Mr. Sutter even included a hand-written note complete with hand-drawn sketch of the Questing Knight, or perhaps a cousin of the Questing Knight, facing down a Soldier Pig and a Raider Pig. Talk about cranking the indie/artisanal charm up to ELEVEN!

oh man look at those pigmen go

Aside from just bragging about receiving this awesome drawing, I also want to mention that Mr. Sutter emphasized in his note how important it is for games like Relicblade that gamers like yours truly (and hopefully you as well, dear reader!) are willing to try new things. While this can be expensive in terms of both time and money, especially when it comes to miniatures gaming, he makes an excellent point: We are lucky to live in a boom era of miniatures gaming and sticking resolutely to the same old-same old is downright ... well ... ungrateful.

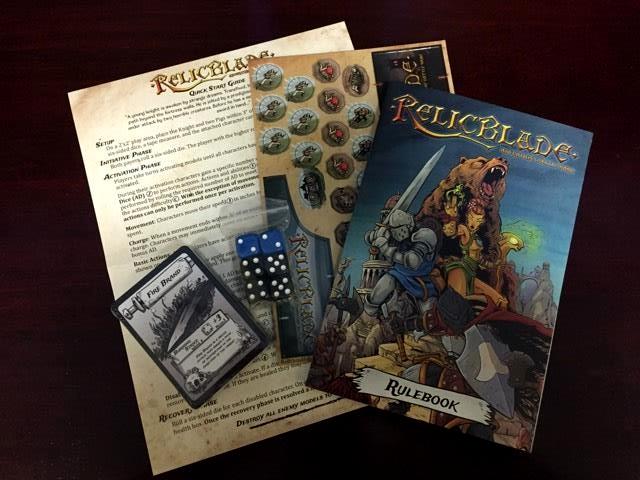
boxed set components (excl. miniatures)

Relicblade is not just a game; it is an achievement. I don't mean that lightly. It could be said in a broad sense for most games, given how much effort goes into them. But the word has a special resonance in the case of Relicblade, where the rules, the layout and editing, the components, the sculpts, the artwork, the setting implicit in the visual design, the marketing, even the distribution - all of this not only flowed from one man's intellect and imagination but in large part is the fruit of one man's dedicated labor. Many gamers dream of accomplishing what young Mr. Sutter already has. Some have tried. Very, very few have produced something as lovely as Relicblade.

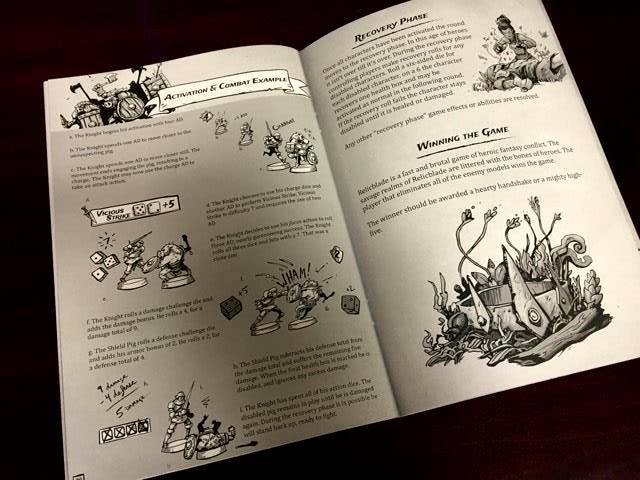
best rules illustrations ever

What makes a game stand out is strong brand identity. Relicblade has brand in spades. The subject may be generic fantasy but the style, and especially the consistency of the style across all the components, feels very personal - the players are invited to step into the world of the game, a crucial aesthetic for miniatures gaming. The mechanics also support immersion. Without going into detail (more on that later), the rules are intuitive and unobtrusive. Everything here reinforces everything else.

Mr. Sutter's achievement should be exciting for all miniatures gamers. There are a lot of talented, driven creators out there. I hope they see Relicblade as an inspiration and a challenge to share their visions with the rest of us!