Having really enjoyed my first adventure using the Nightwatch rules, the only thing for it was to keep experimenting. How easy would it be to adapt Nightwatch to exploring a dungeon environment? Only one way to find out: send more hobbits into peril!

The main challenge would be adjusting the movement rules given the relatively cramped interior spaces involved. Per the book, the default movement rate in Nightwatch is seven inches (a six inch front-to-back or "leap frog" move) that is halved for difficult terrain. In my estimation, this would be way too generous for indoor adventuring. The solution was pretty obvious, based on my experience with "crawler" board games and our own "Dungeons Deep & Caverns Old" miniatures game: zone movement. So once I had the basic layout of the dungeon set up, I just needed to carve it up into zones.

I'll reference this map throughout the report below but for now suffice it to say that our adventurous Halflings would spend their first free move to enter via E1 into zone 1-A. Green rectangles represent open passages while red ones designate passages that are permanently or temporarily blocked.
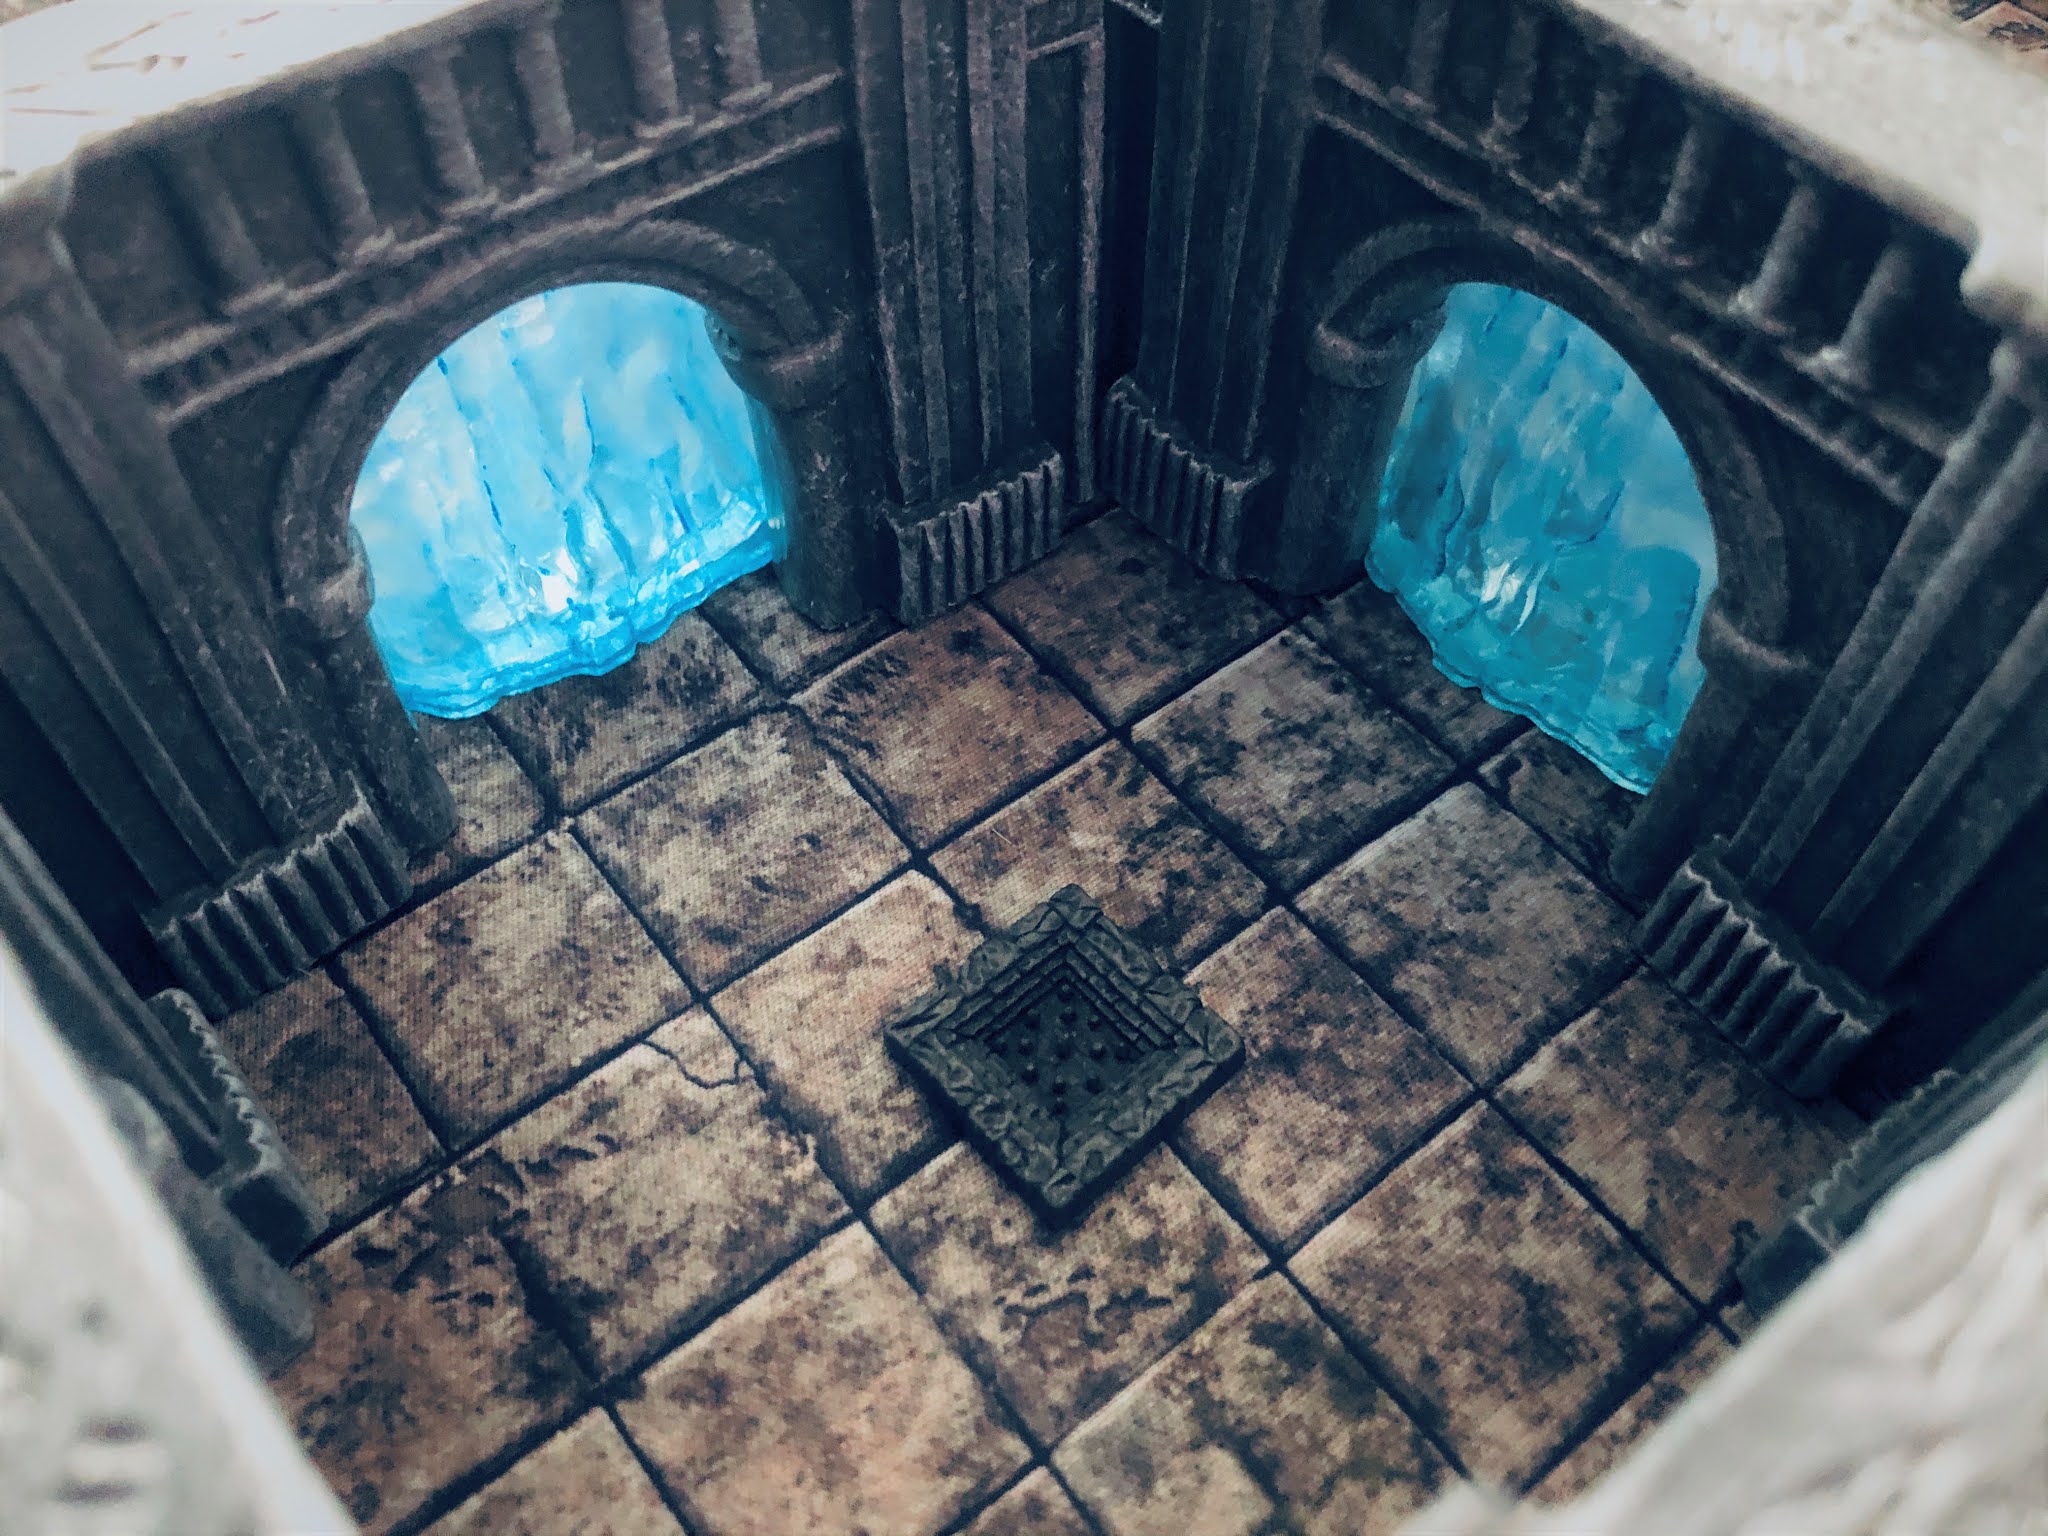
The next challenge was handling indoor ranged attacks. I constructed this dungeon using pre-painted terrain available from Urbanmatz; more precisely, their Gothic Walls. This set has pieces with open passages as well as semi-obstructed ones per the photo below.

I decided that neither PCs nor Monsters could move through these passages but could shoot through them at a -2 penalty. Several Skeletons armed with bows started in-play, in rooms where they could be shot or from which they could shoot out but not be reached for melee combat.
The next issue was figuring out how tough to make the Skeletons. I started out by using the Vermin rules (free move + 1d6 activation dice pool) but found that made the bonemen too chumpy. So I settled on giving them a 2d8 dicepool and allowed them to spend 1d8 for a free move. The result was them being pretty dangerous but also kind of slow, which felt right for the dungeoneering experience.
 |
| Room 2 |
The Halflings started by exploring Room 2, the barracks. To get to the investigation point in zone 2-C, they would have to navigate either or both of zones 2-A and/or 2-B. As you can see on the map above, I have those zones marked with a special border, indicating that they are dangerous terrain. In the picture above, you can see that there are traps on the floor.
Mechanically, this is represented by the PCs needing to use an action to make a check to avoid the traps when moving into (but not out of) the zones. The PCs need not make this check, but if they don't (or if they did and failed), they would take a wound. This further slowed down the pace of exploration and lent the small space a somewhat "larger" (cinematically speaking) sense.
Having made it past the traps, the Halflings found a tattered journal in a chest next to the bunks indicating that the nearby Chapel-Infirmary (Room 5) had been desecrated and the corpses of former guards turned into necromantic batteries powering magical barriers preventing exploration deeper into the dungeon.
 |
| Room 3 |
Two of the three magical barriers were blocking the north and east passages of the central intersection at Room 3, which as you can see from the map and the photo above was also trapped. The Halflings had little reason to back to Room 2 but nevertheless the trap in Room 3 would make navigating the dungeon difficult throughout the entire session.
In a small pouch tucked away with the journal, the Halflings found a charm that, according to the anonymous author, could be used to purify one of the defiled corpses and thereby dissolve the associated barrier. But navigating the Chapel-Infirmary, would be precarious because it was likewise full of traps. This time, poison gas! Fortunately, the journal also explained that an antidote for the poison could be found hidden away somewhere in the cluttered stores (Room 4).
 |
| Room 4 |
Even despite Room 4 being one of the smaller physical spaces in the dungeon, I decided to carve it into three zones to simulate the difficulty of navigating all the junk. (Note that D3 is permanently blocked by cumbersome supplies.) I had a mechanic kinda-sorta in mind for how the Halflings could try to find the poison antidote among the crates and barrels and chests but I did not end up using it because, well, let's just continue the story for now. On to the Chapel-Infirmary.
 |
| Room 5 |
Room 5, like Room 4, is carved up into quite a lot of zones. I designed this area for a lot of player interaction and wanted to make sure that it was plenty dangerous but not overly lethal. Instead of taking a wound for failing the check to move carefully (or just failing to even attempt to move carefully), the unlucky (or incautious) PC would take a poison token that would inflict a -1 penalty on any roll of their largest remaining die in their dice pool.
So, for example, a PC who had already taken a single wound also took a poison token, they would roll their d8 at -1. If they took an additional poison token, they would roll both their d8 and d6 at -1. Worst of all, a third poison token at this point would eliminate their free move! This ended up being pretty tense and, well, let's just say I probably should have spent some time searching for the antidote.
I should also note that all this time, during the Darkness phase, a single Skeleton had a 5 in 6 chance of entering the dungeon at E2. So in addition to all of these traps, the Halflings were also constantly fighting the undead (who I decided could not be harmed by the traps). But at this point, things were still looking pretty good.
In order to lower one of the magic barriers, the Halfling equipped with the charm would need to perform an interact action at one of the three investigation points in zones 5-B, 5-C, or 5-D. I decided that it didn't matter which one at this point: upon a successful interact action, the barrier blocking D1 would dissolve. The issue was, which barrier would be dissolved the second time the Halflings tried the ritual? I decided to randomize it between D2 and E4.
Also, at this point, Skeletons were now appearing at either E2 or E3. Rooms 8 and 9 were of course still blocked off by D2. The idea there was, if the PCs dissolved the barrier blocking D2, a whole slew of bonemen could march out at them together ... or not, depending on how the dice rolled when it came to randomly assigning new Skeletons every Darkness phase. As it turned out, quite a few of them started to build up at 8-A:
 |
| Room 8 |
But that wasn't a problem just yet. Dissolving the barrier blocking D1 opened up Rooms 6 and 7. The first was just a hallway with another magical barrier blocking E4. But Room 7 was the Officer's Quarters, where the Halflings could find another charm to purge one of the remaining two necromantic barriers in the Chapel-Infirmary. No matter which investigation point they chose, however, the outcome was a fifty-fifty chance between D2 and E4.
 |
| Room 7 |
 |
| The Final Confrontation |
 |
| Alas! |
 |
| Room 9 |
